
What's new in Rekey 2.4
Blog ReleaseRekey 2.4 turns the hosted portal into a full account page for your customers. They can create an account, sign in the way your application allows, set up two-factor, change their email, invite their team, free a device slot and approve a desktop app. You did not have to build any of those pages, and you can serve them from your own domain.
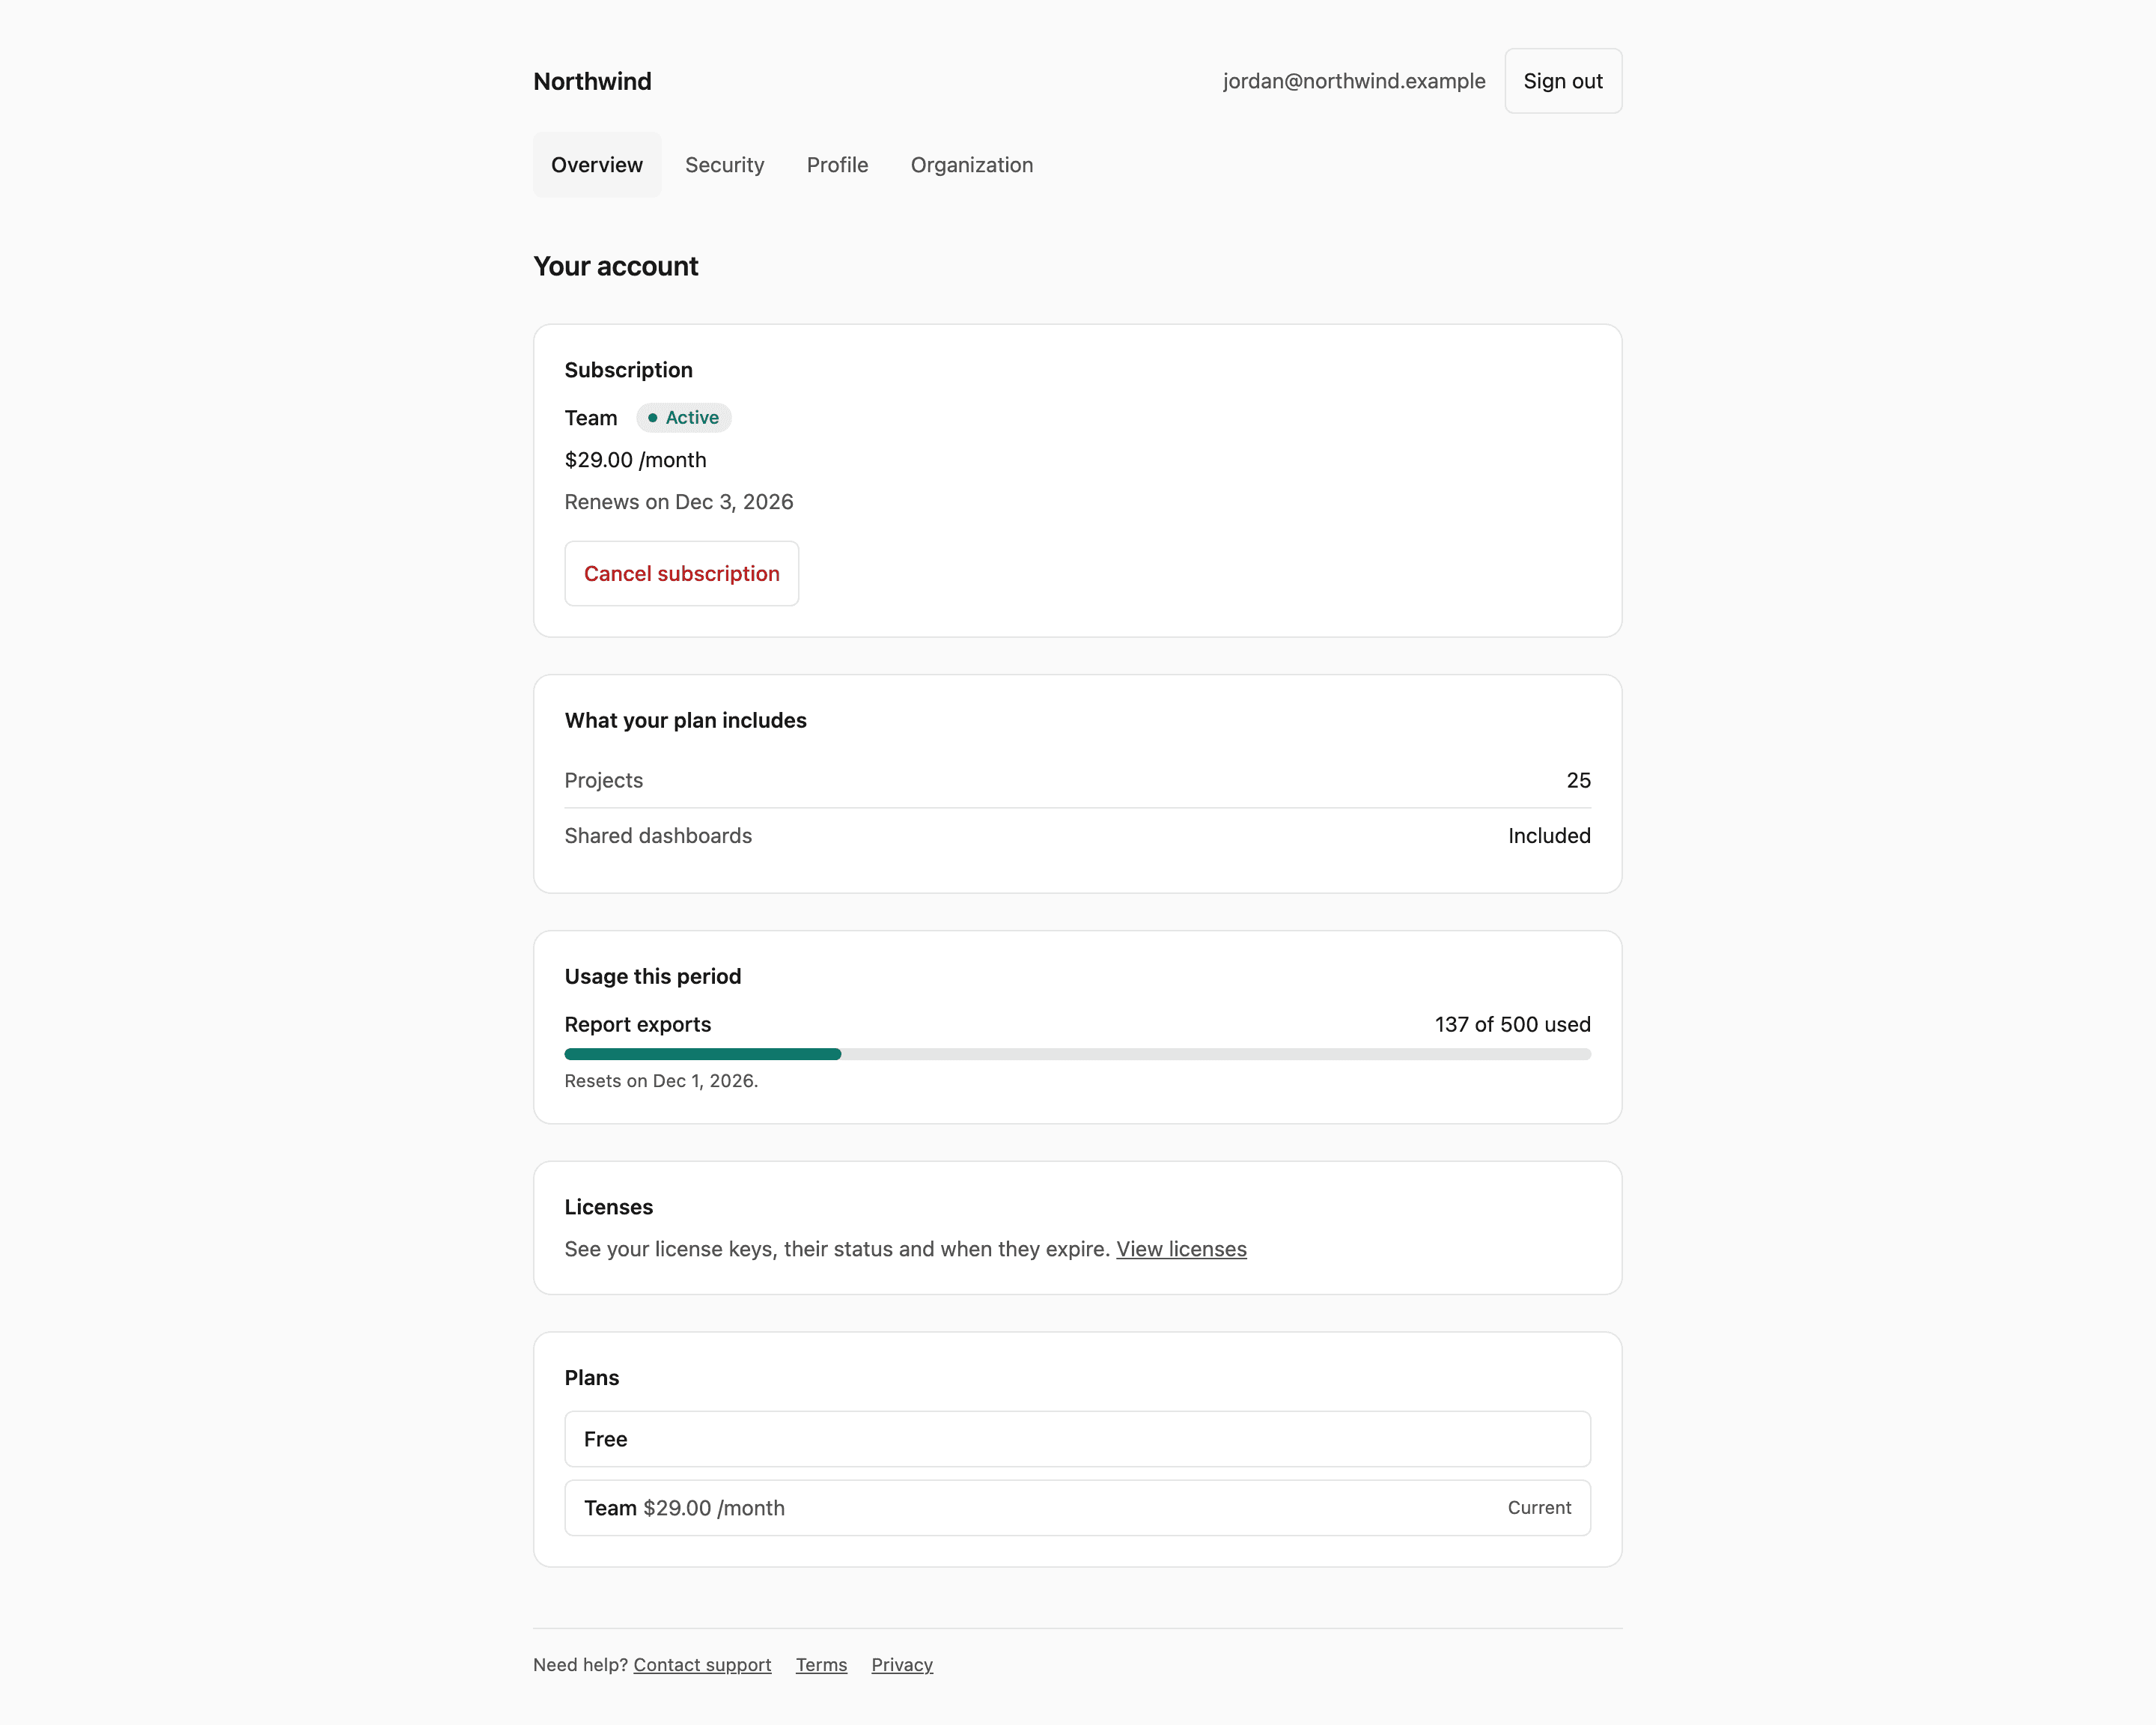
Until now the portal was mostly a billing page: sign in, see the plan and payments, cancel. Everything else was a page you wrote yourself or a support ticket. You turn it on per application in the panel under Application, Billing, Portal, and it reads the sign-in methods, profile questions and branding you have already set.
Sign in and sign up
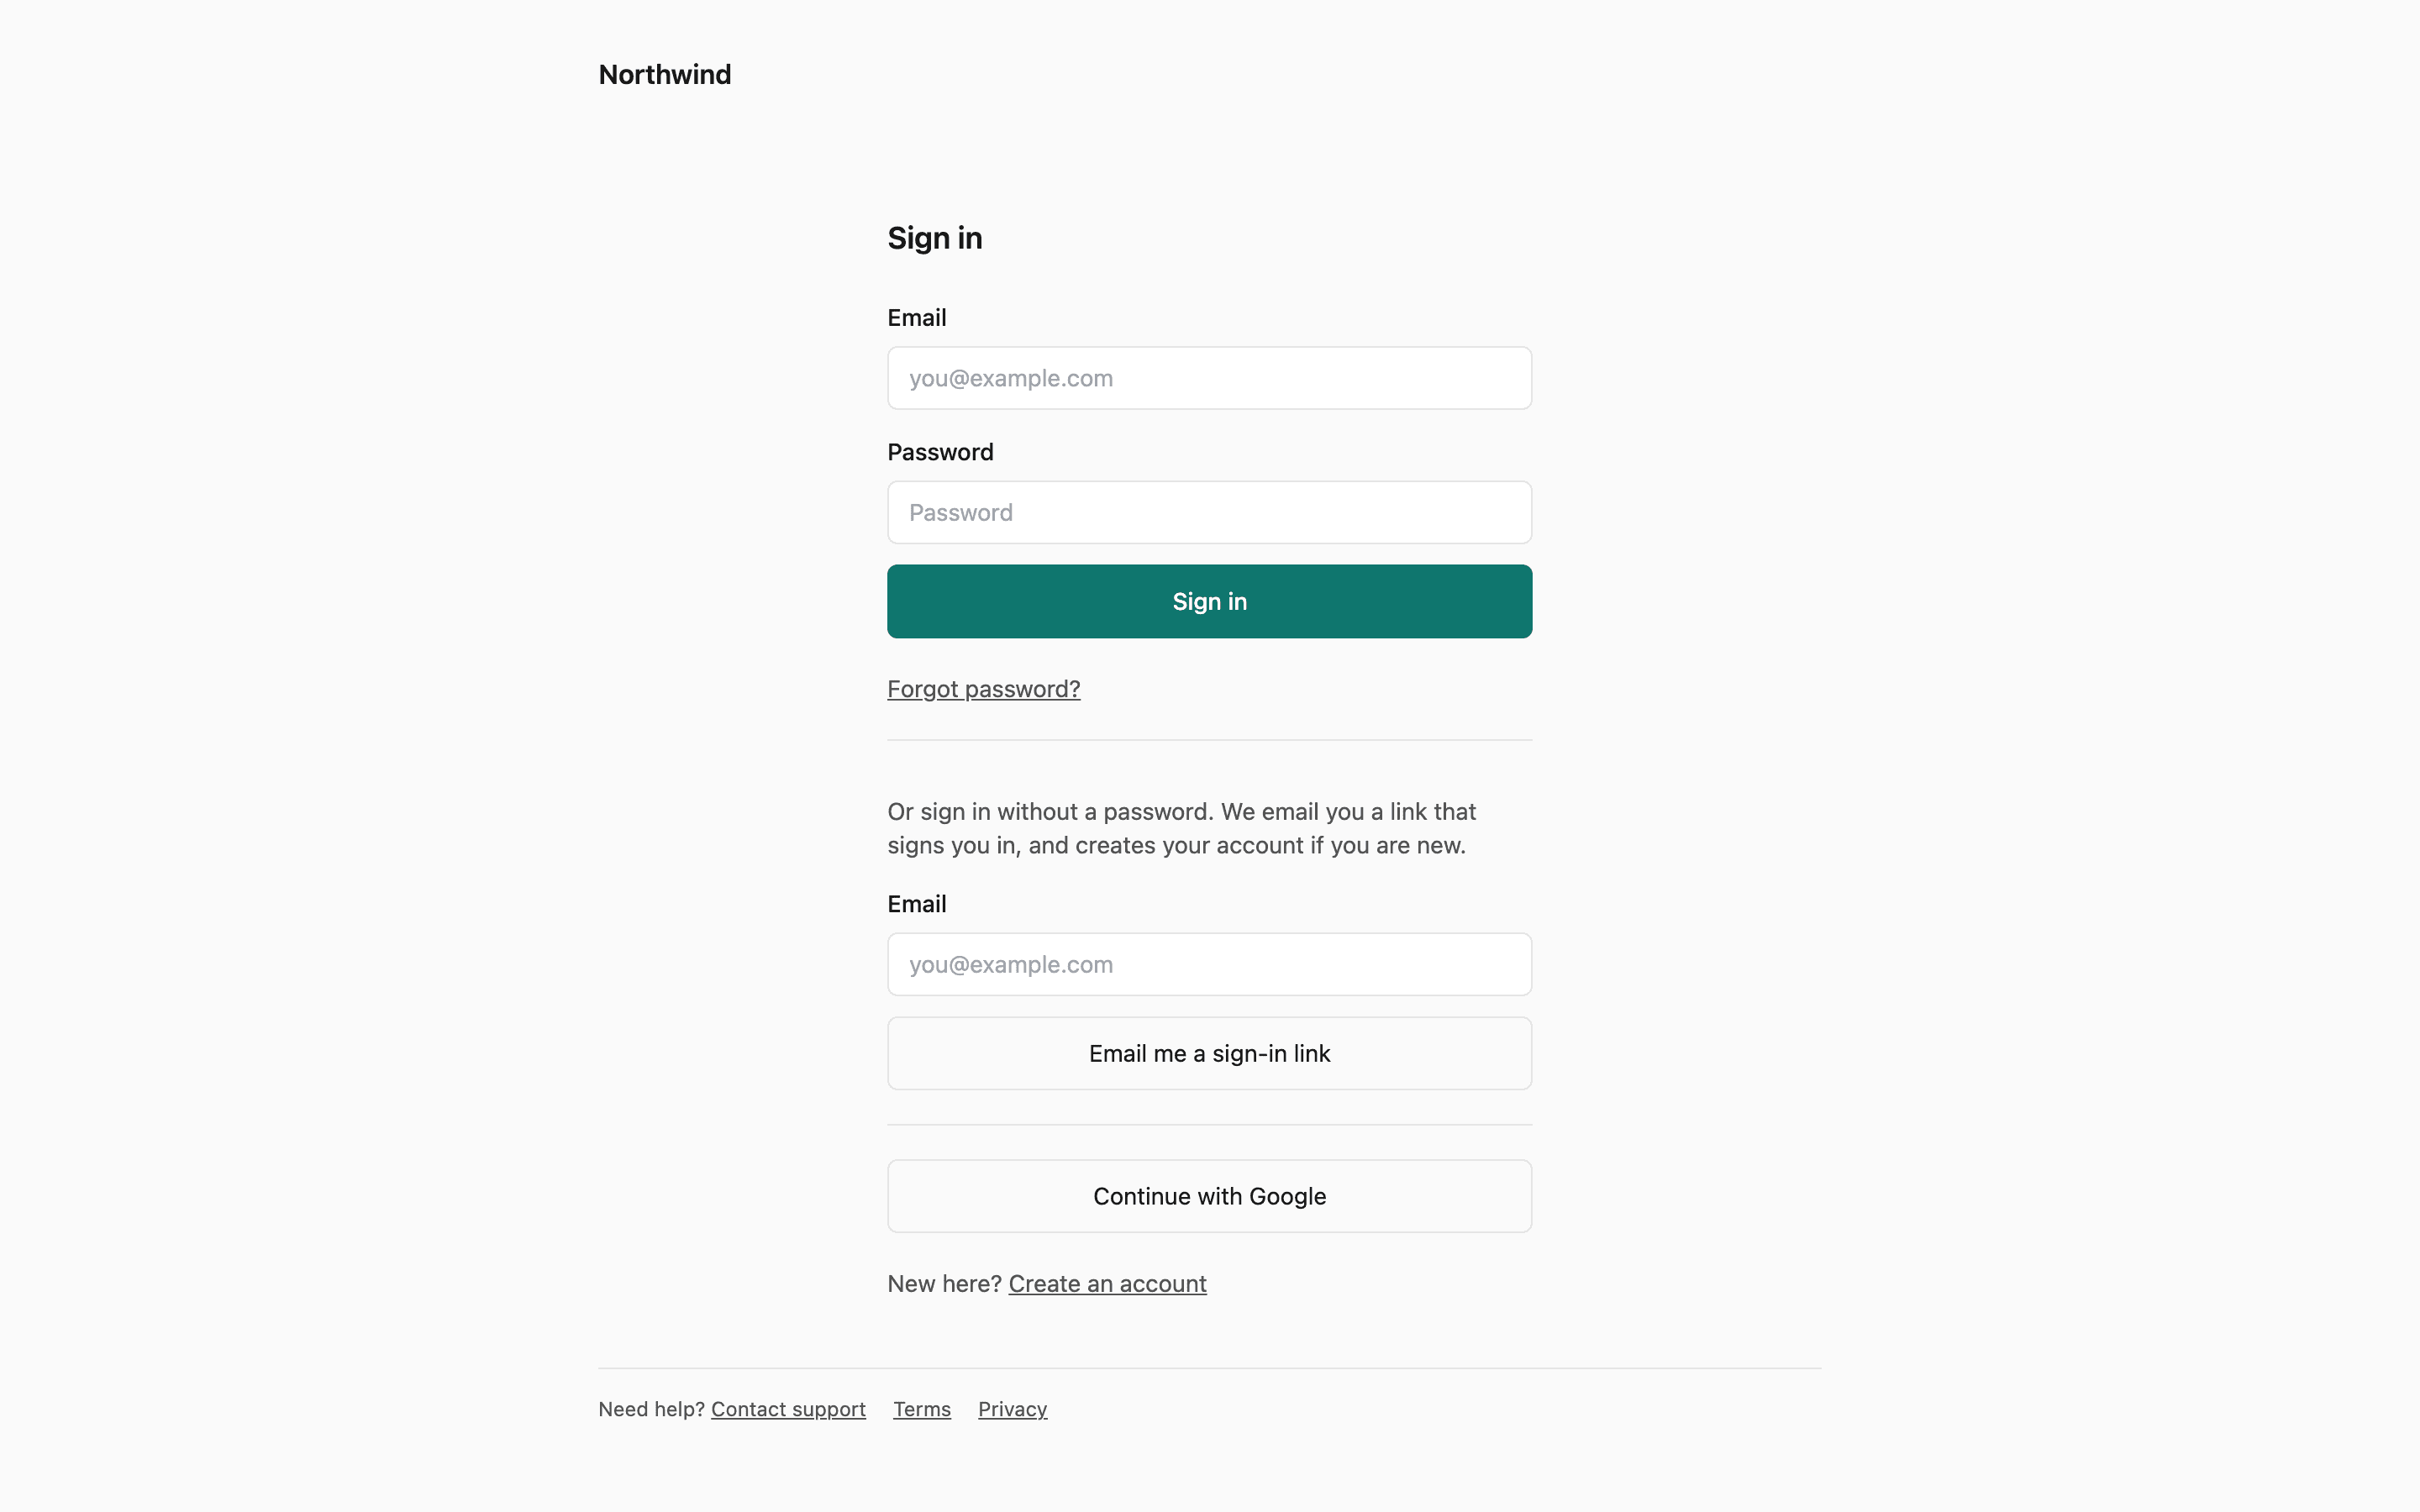
The sign-in page offers what the application allows: a password, an emailed sign-in link, or both. Social sign-in is opt-in per provider. Add the portal's callback, <PUBLIC_PORTAL_URL>/<slug>/oauth/callback, to the provider's console, then tick Offer in the hosted portal on that provider in the panel. Until you do, the portal shows no button for it. When the application has no method the portal can offer, the page says that sign-in happens in your app.
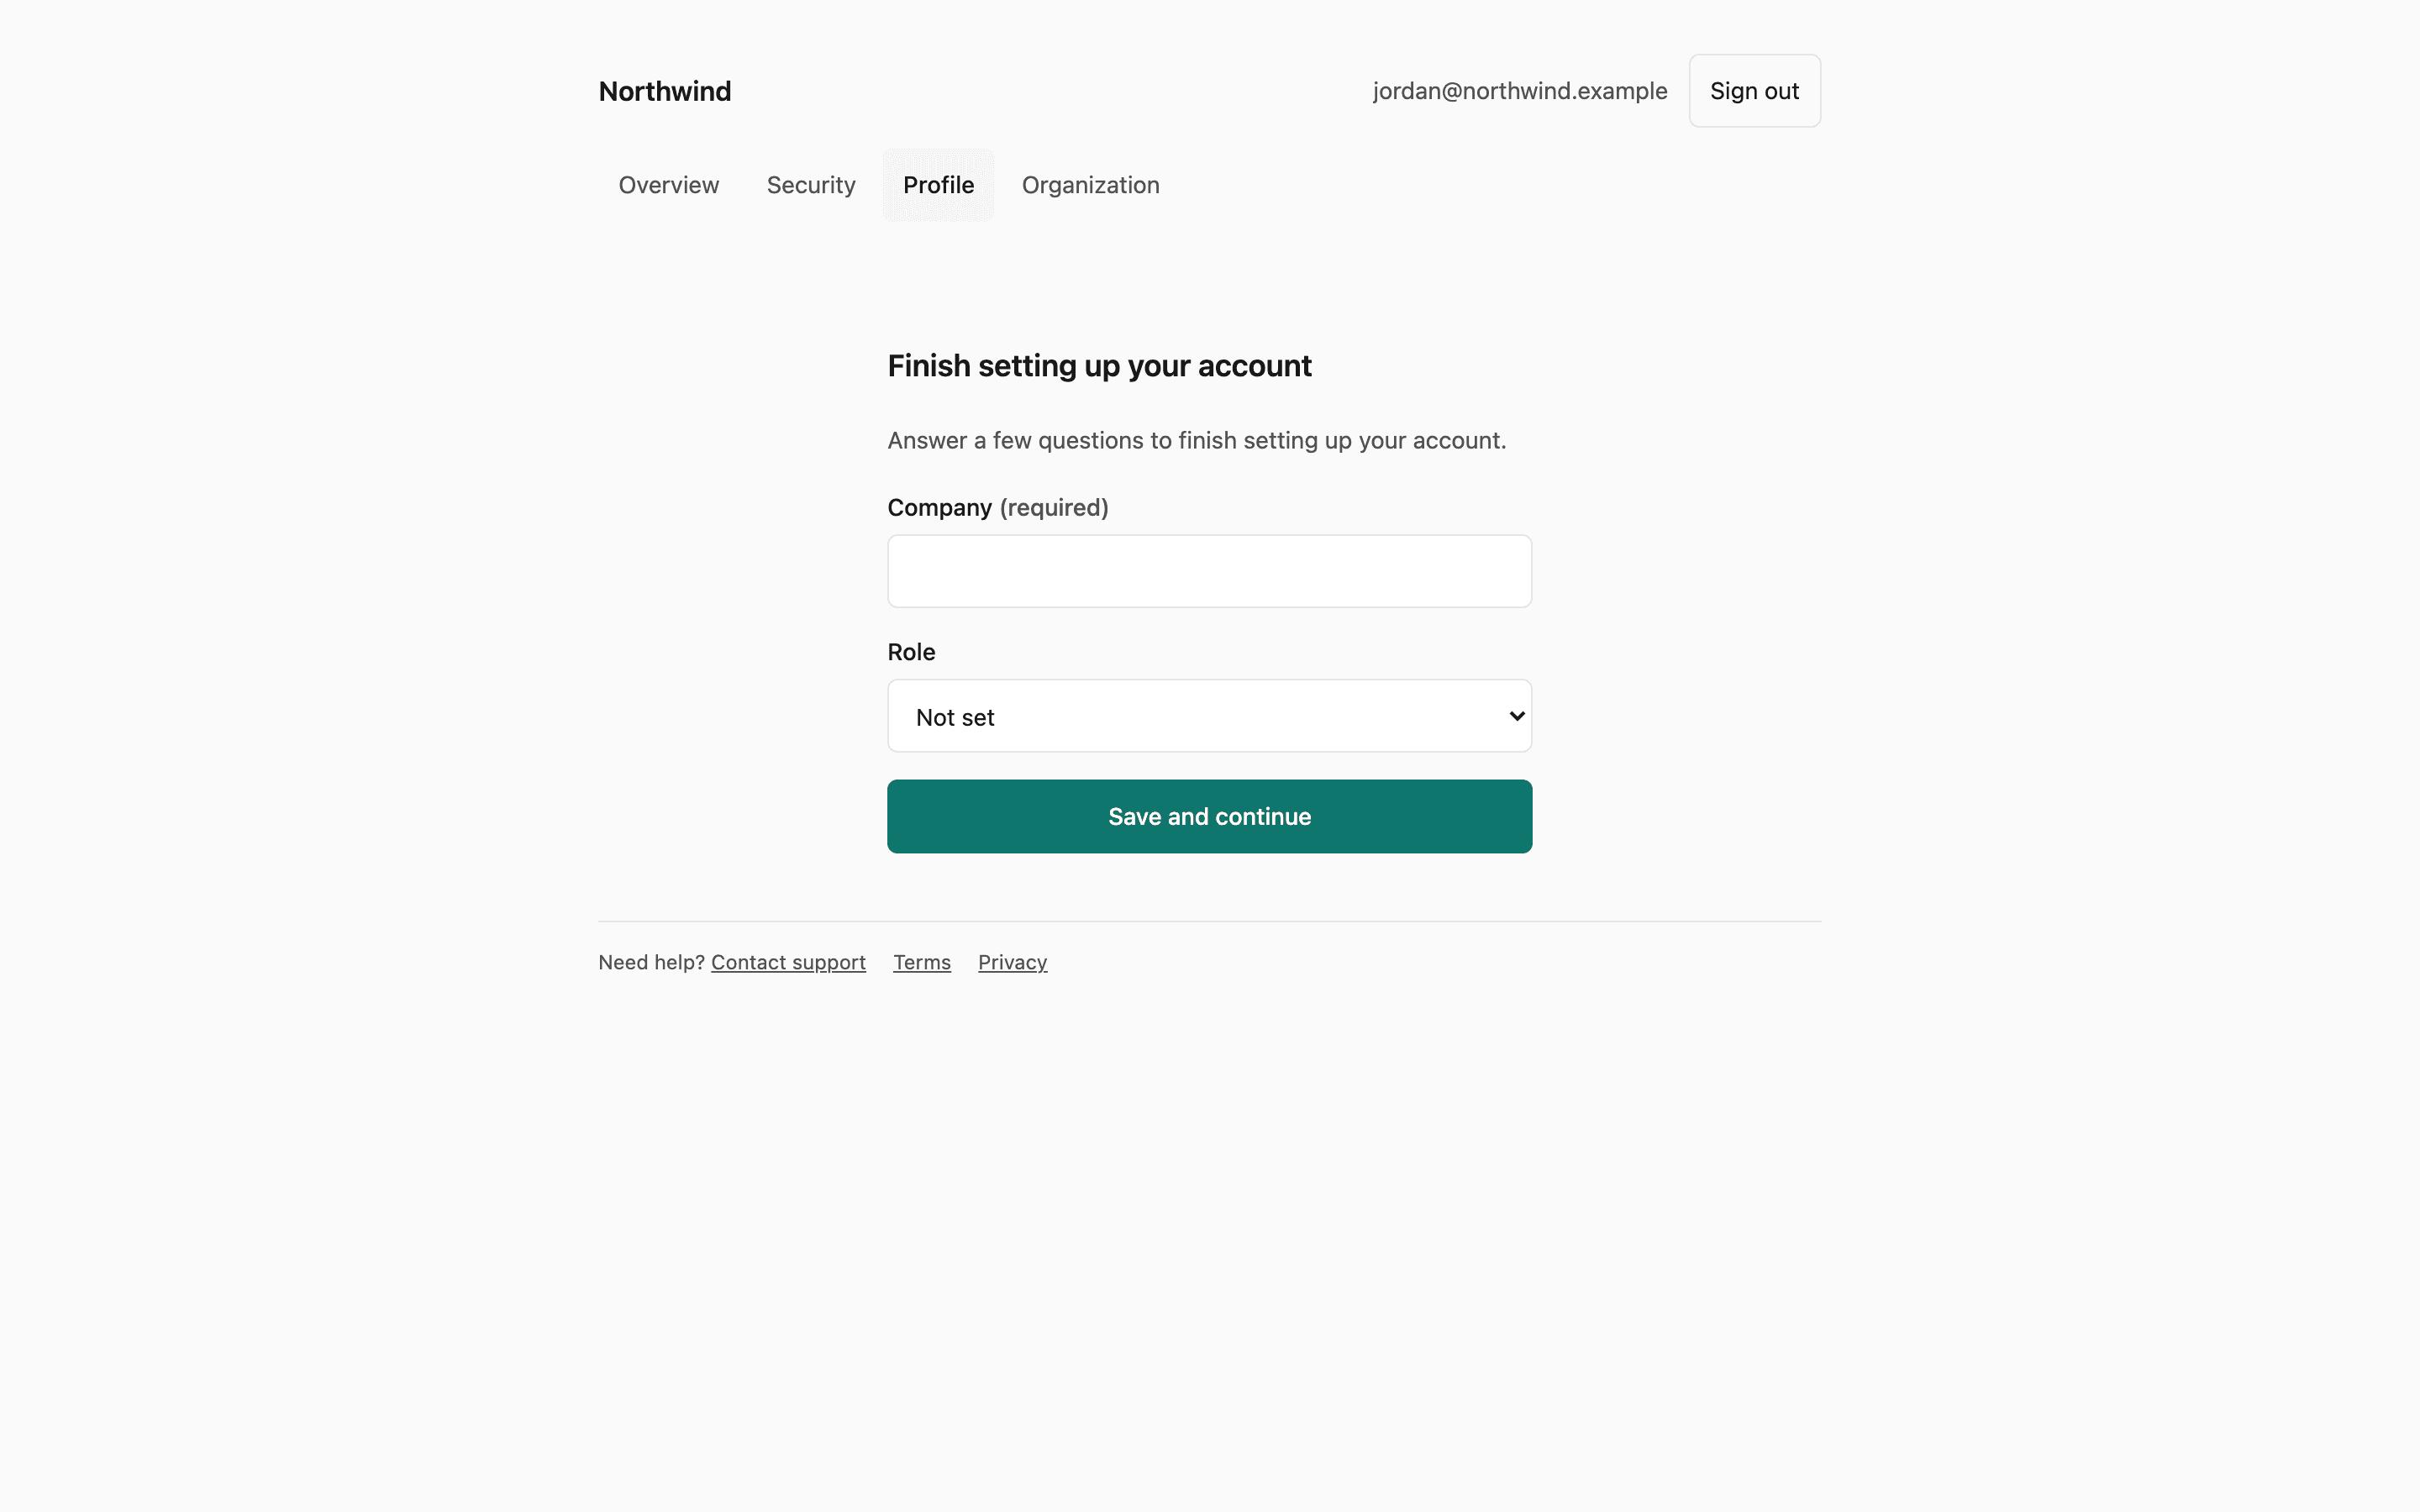
While sign-up is open (signupMode: public), customers can create an account from the portal. When the application requires a confirmed address, the page asks them to check their inbox and offers to resend the link. It shows the same page whether or not the address already had an account. When your profile schema has required fields, the next step asks for them, and the dashboard waits until they are answered.
Mail scanners open links to check them, and a single-use link opened by a scanner is gone before the customer clicks it. So every emailed link the portal handles (sign-in, email confirmation, password reset, email change and invitations) only opens a page with a button. The token is spent when the customer presses it.
Security and profile
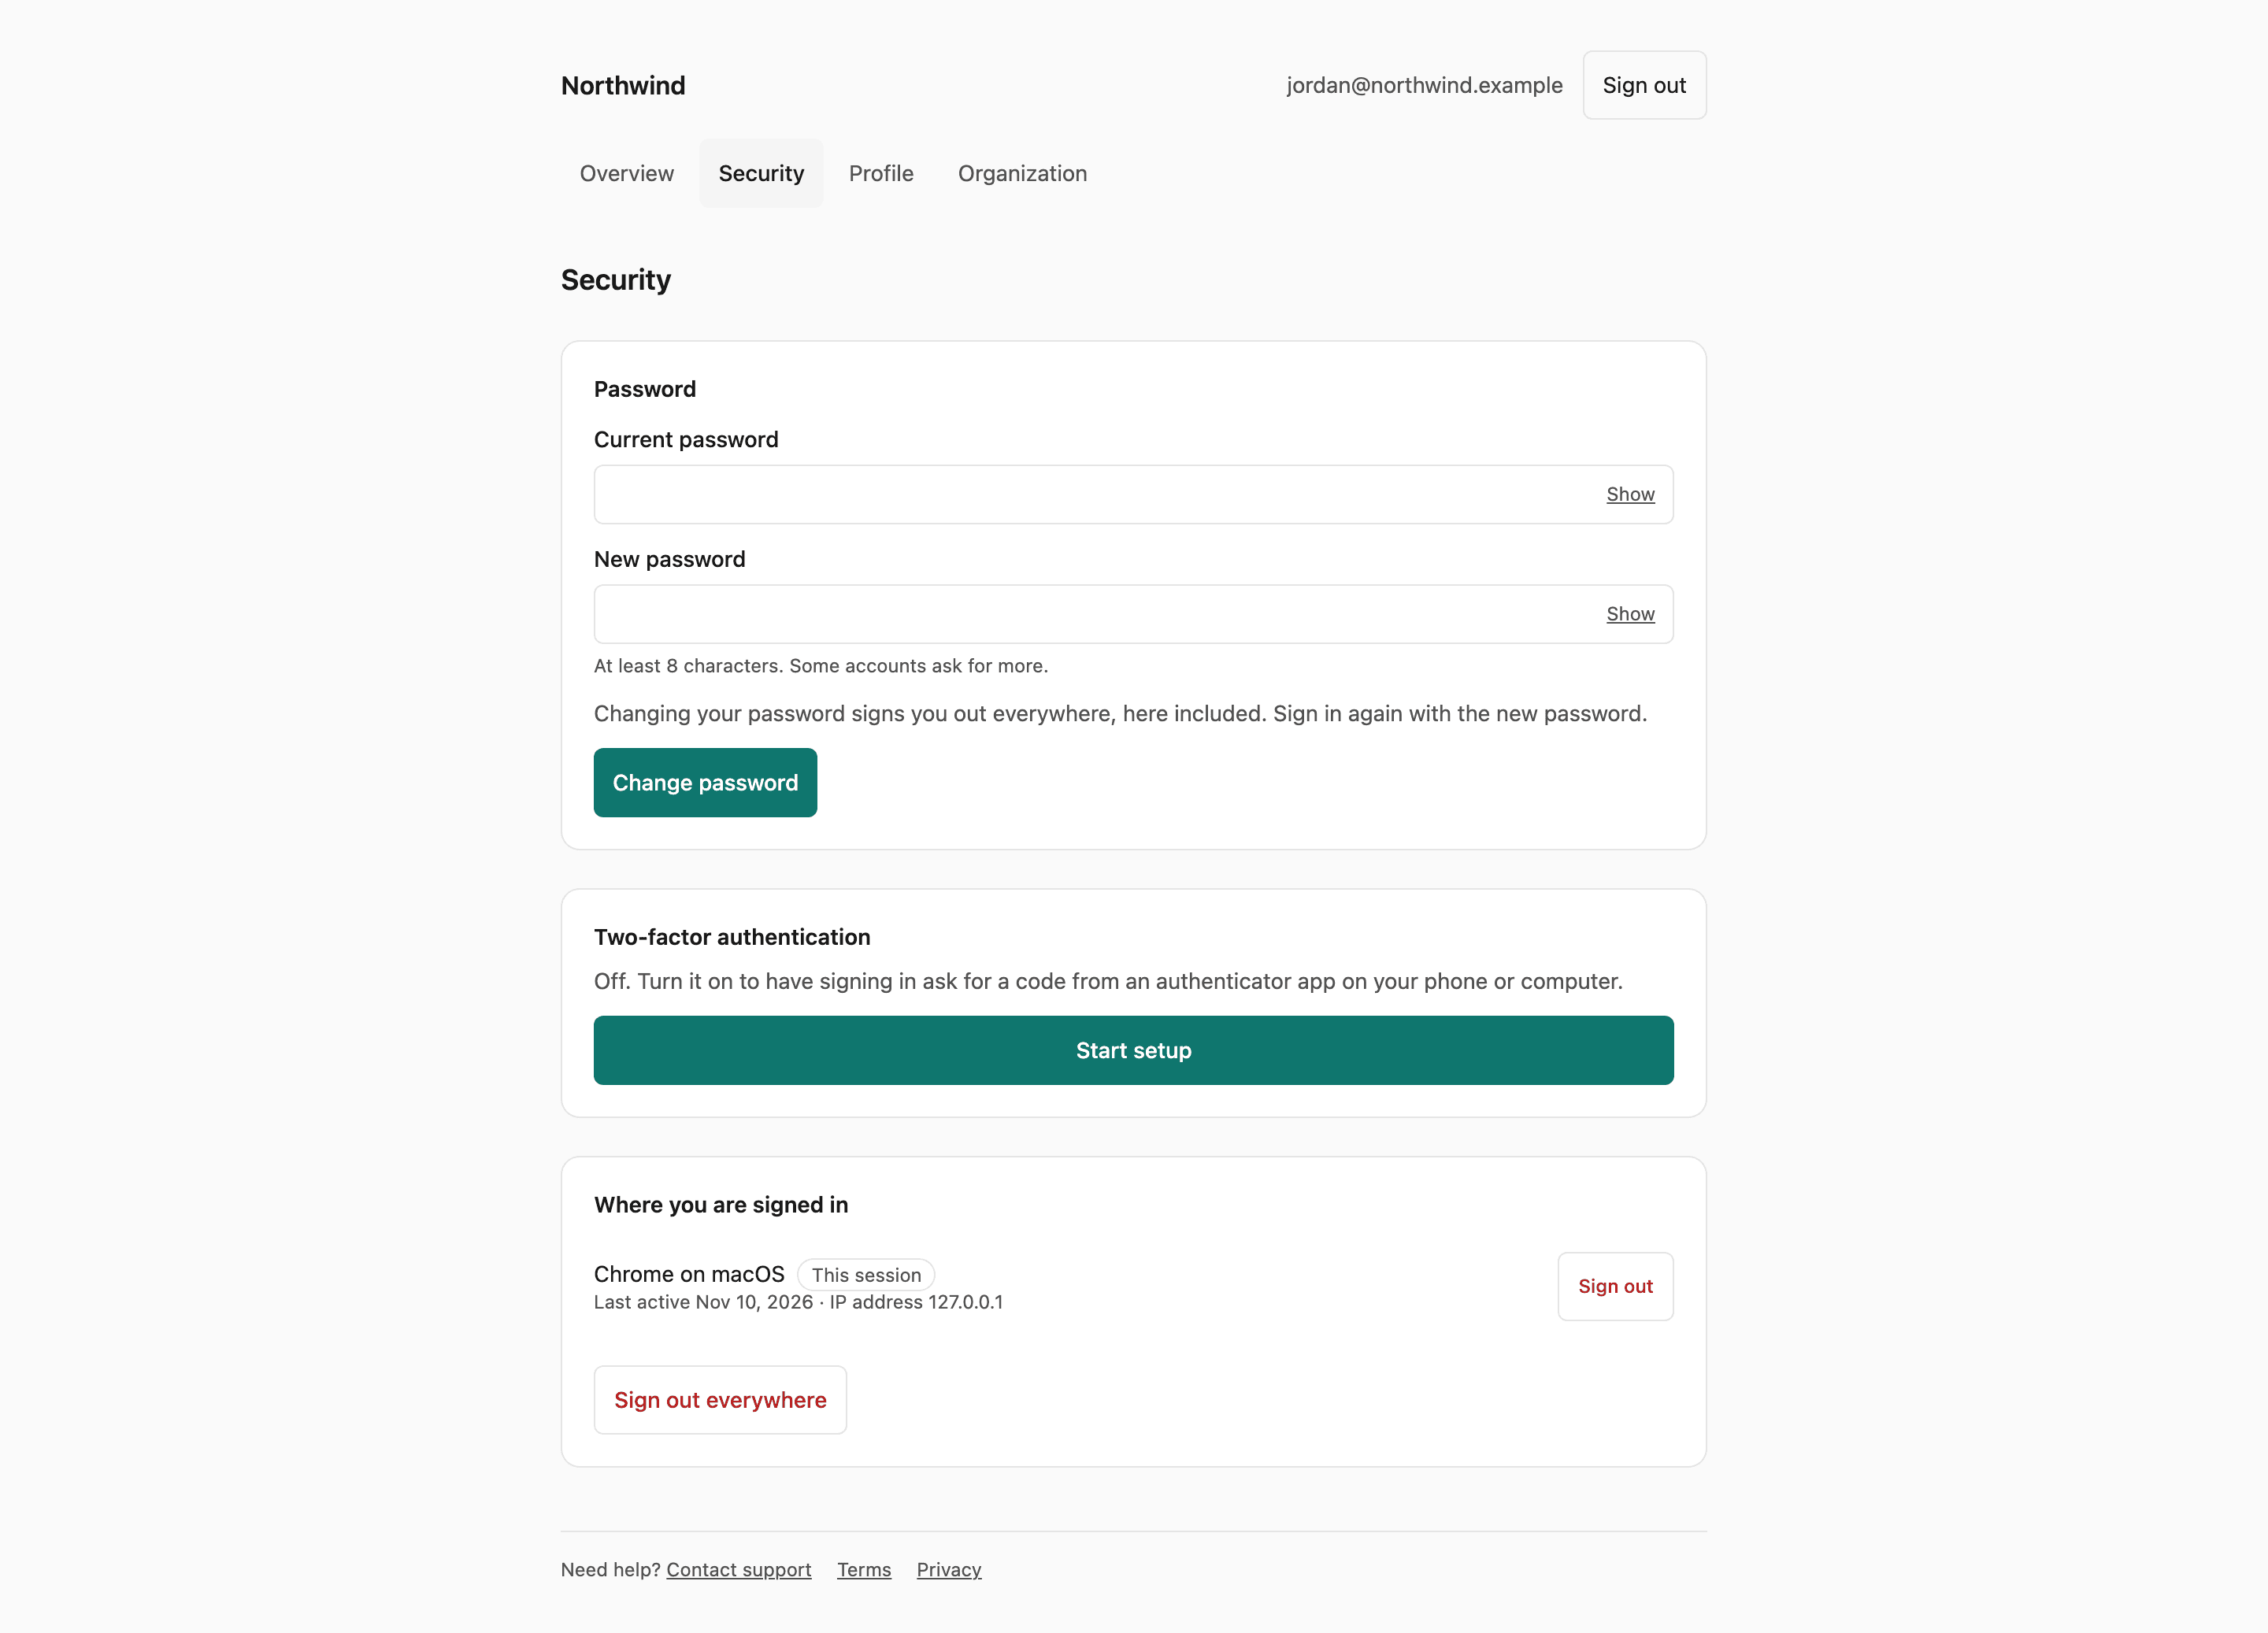
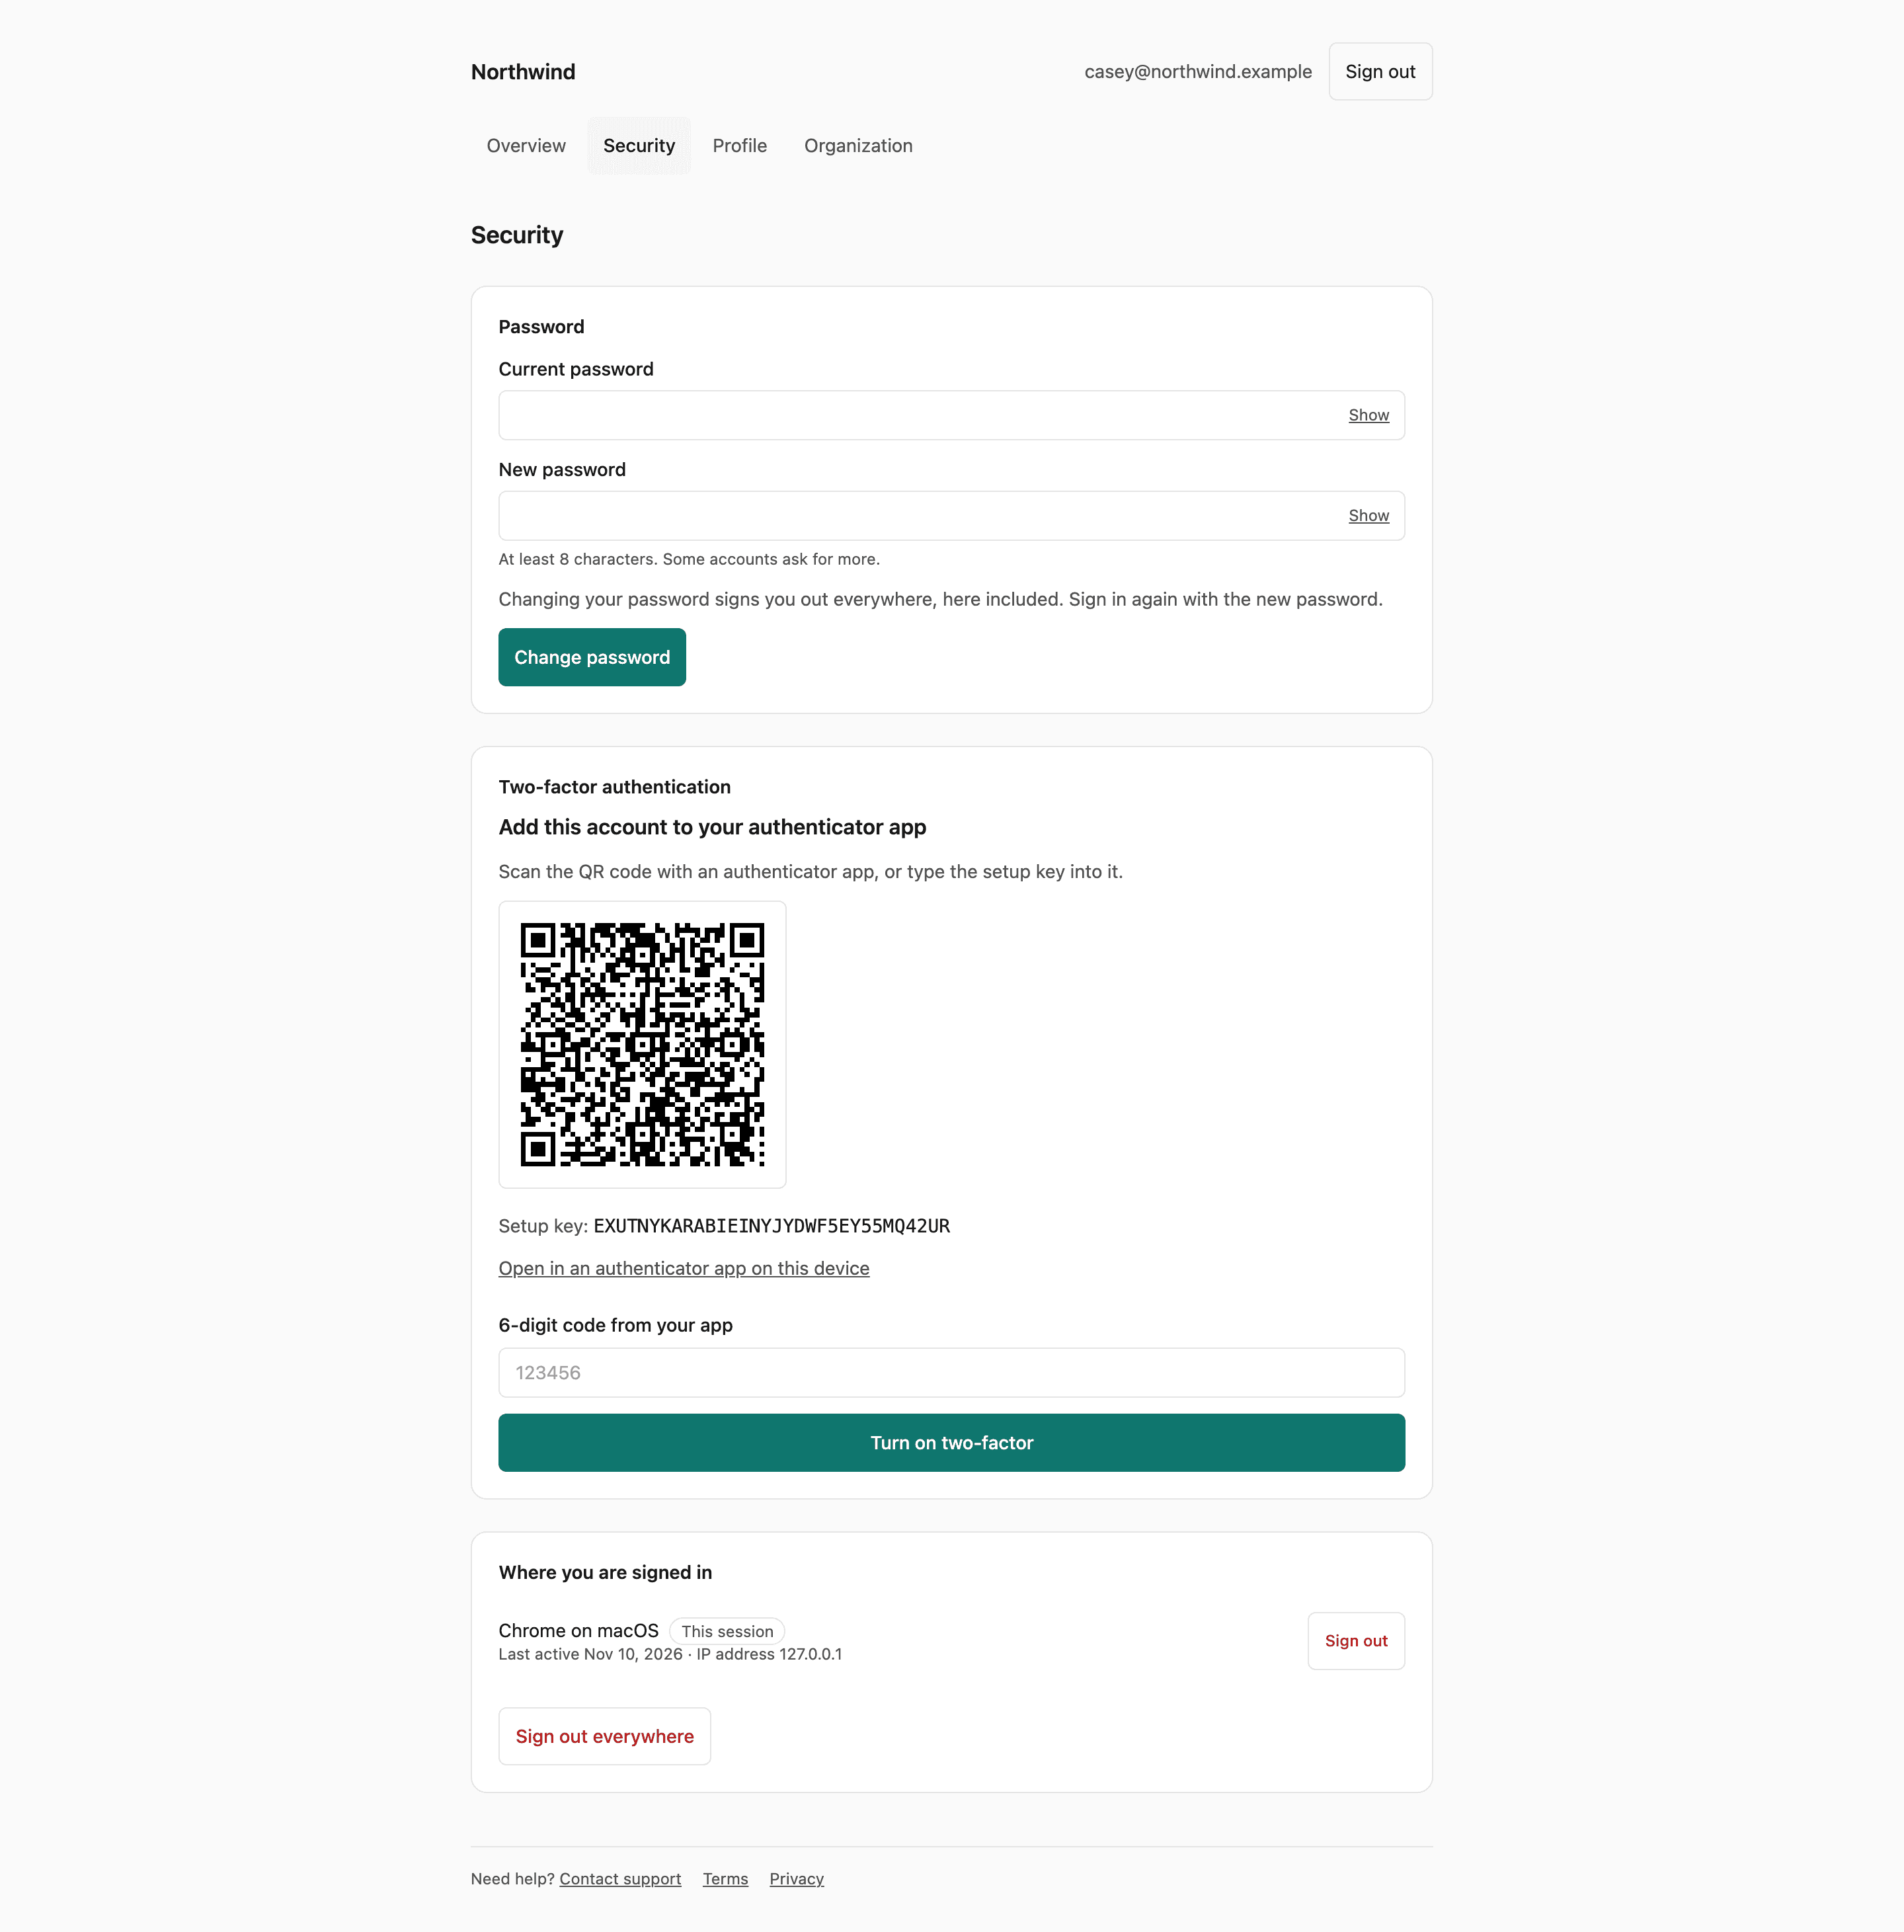
The Security page lets a customer change their password, or create one with a code emailed to them if they signed up by link or with a provider. They can turn two-factor on or off, replace their backup codes with a current authenticator code, see where they are signed in with this session marked, and sign out one session or all of them. They can also remove a linked sign-in provider, unless it is the only way they can sign in.
Setting up two-factor shows a QR code and the setup key, asks for a code from the authenticator app, and then shows ten backup codes once. The authenticator entry carries your portal's display name, or the application name.
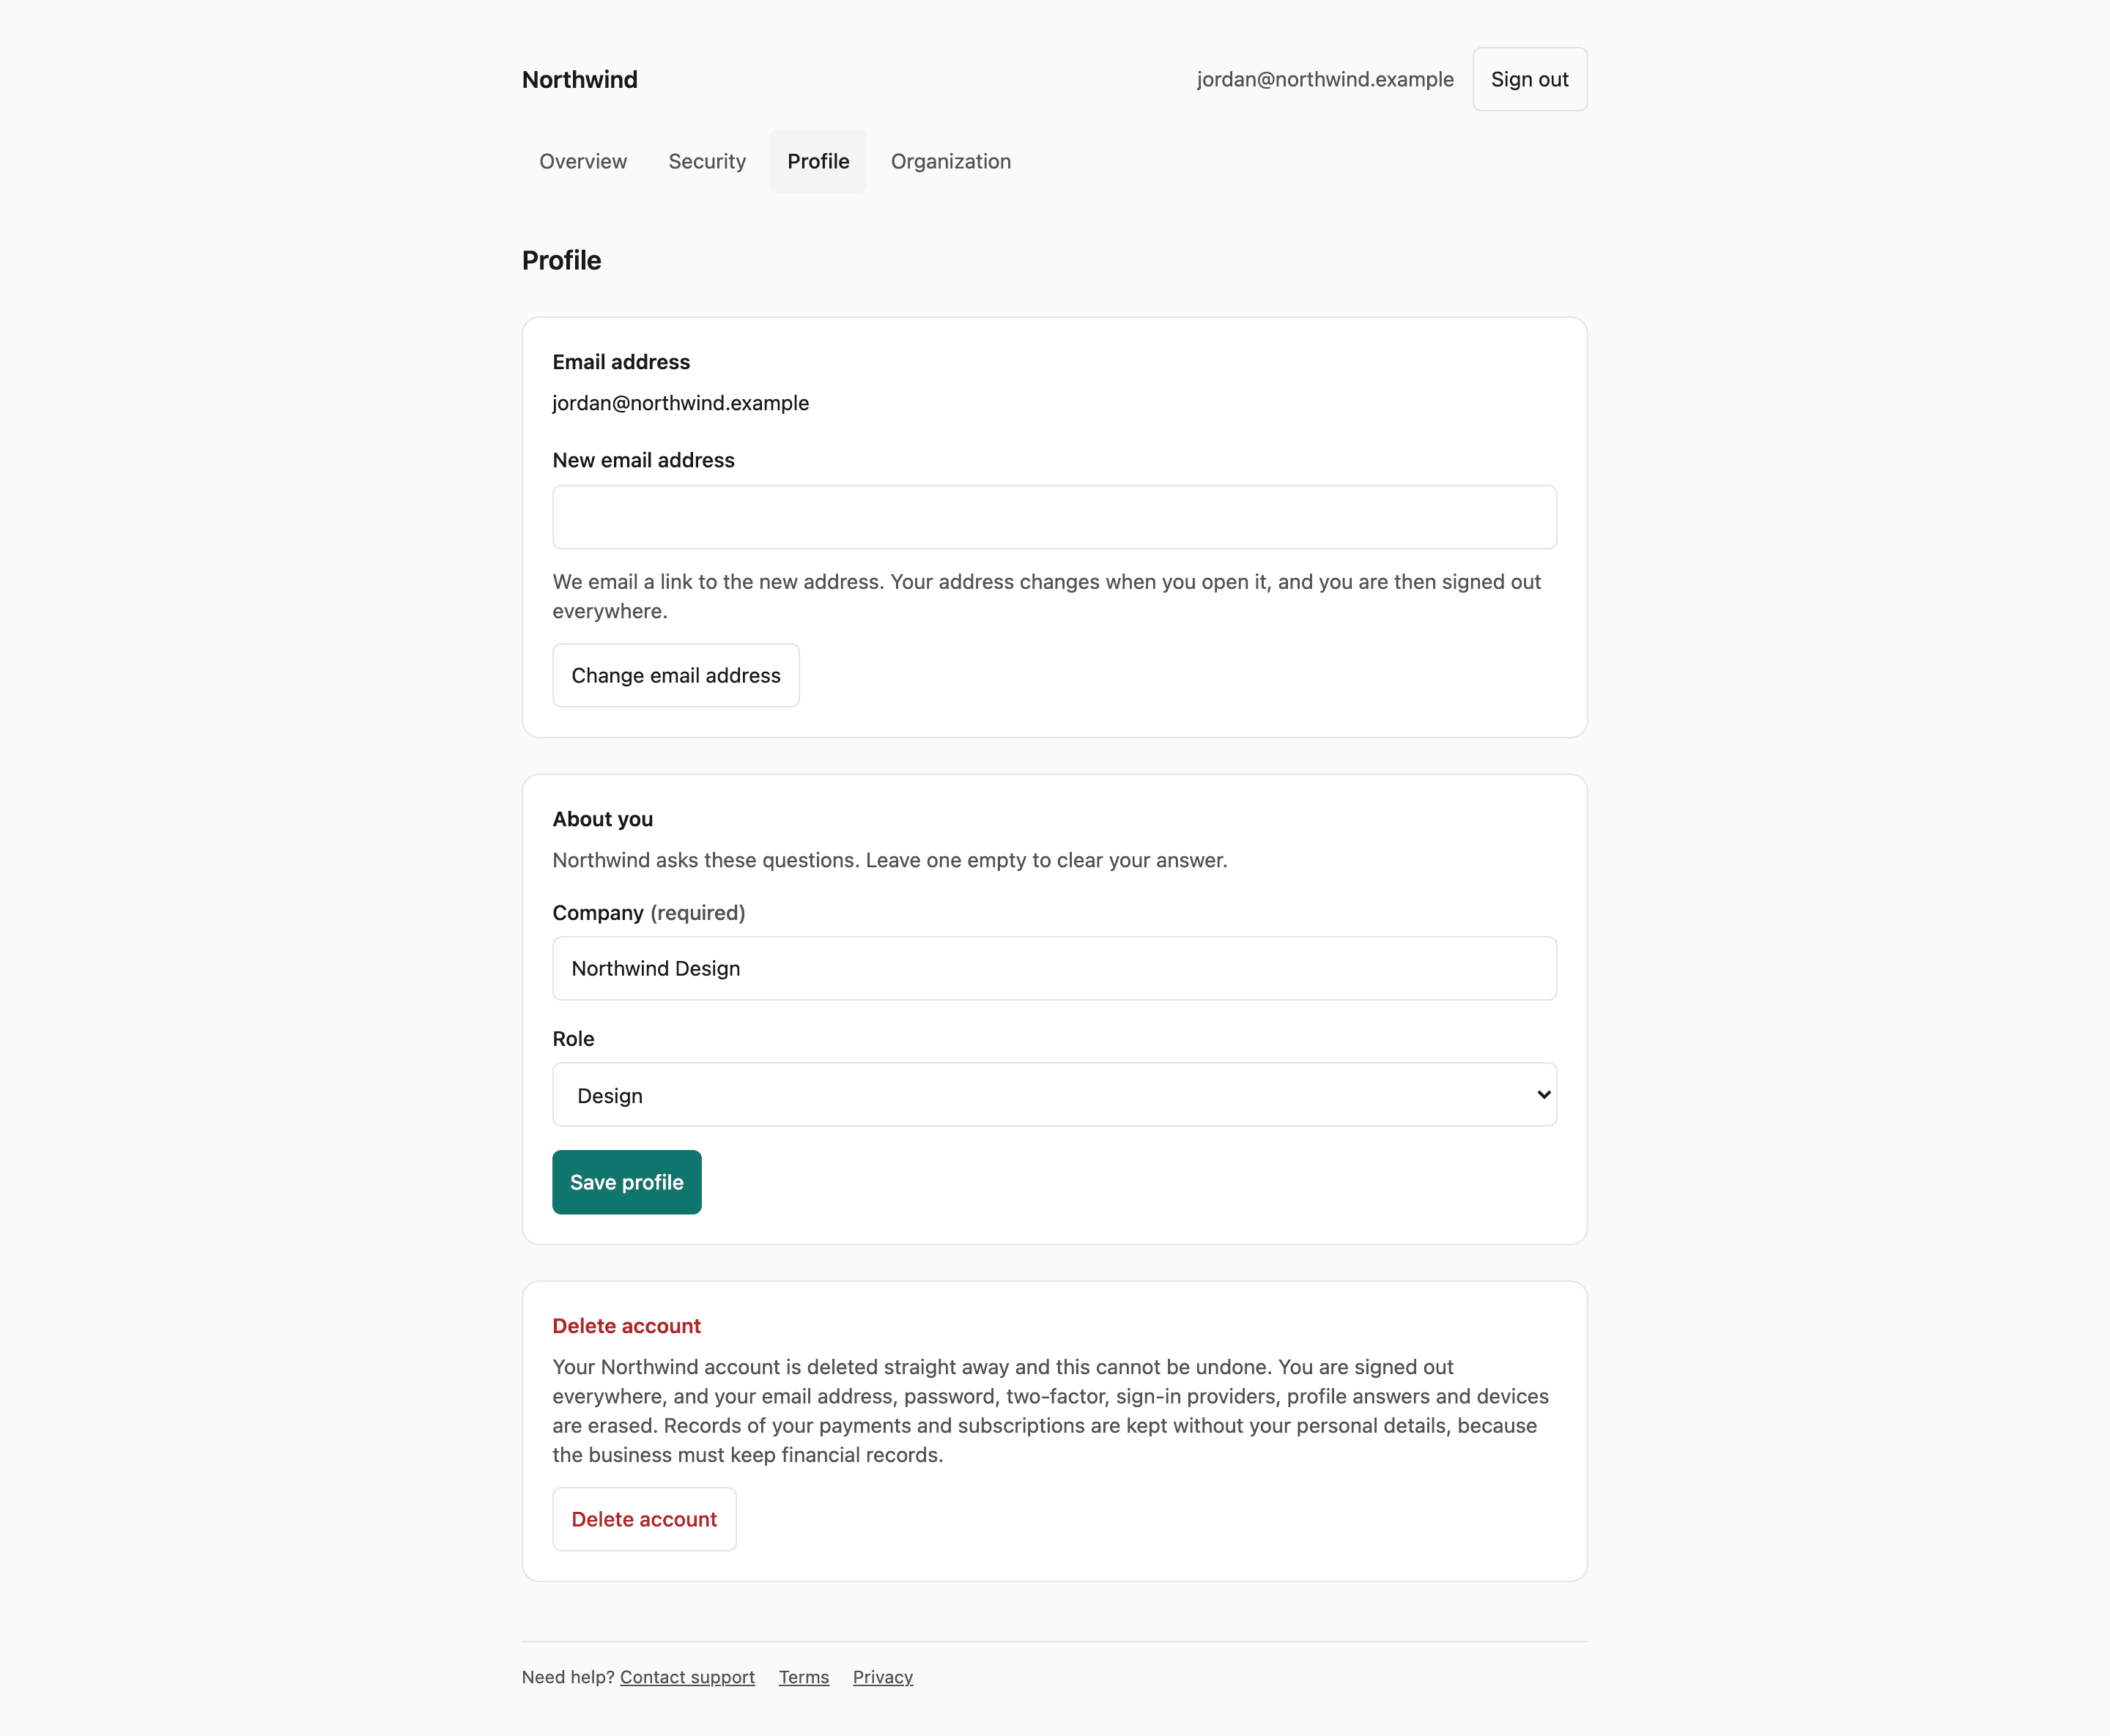
The Profile page holds the email address, the answers to your profile questions and account deletion. Changing the email sends a link to the new address and a notice to the old one. The address changes only when the link is used, and that ends every session. Deleting the account asks for the password or a two-factor code. An account with neither gets a code by email instead. Deletion follows the accountDeletion setting from 2.3: with off or server_only the portal refuses it and points the customer at your support contact.
Teams
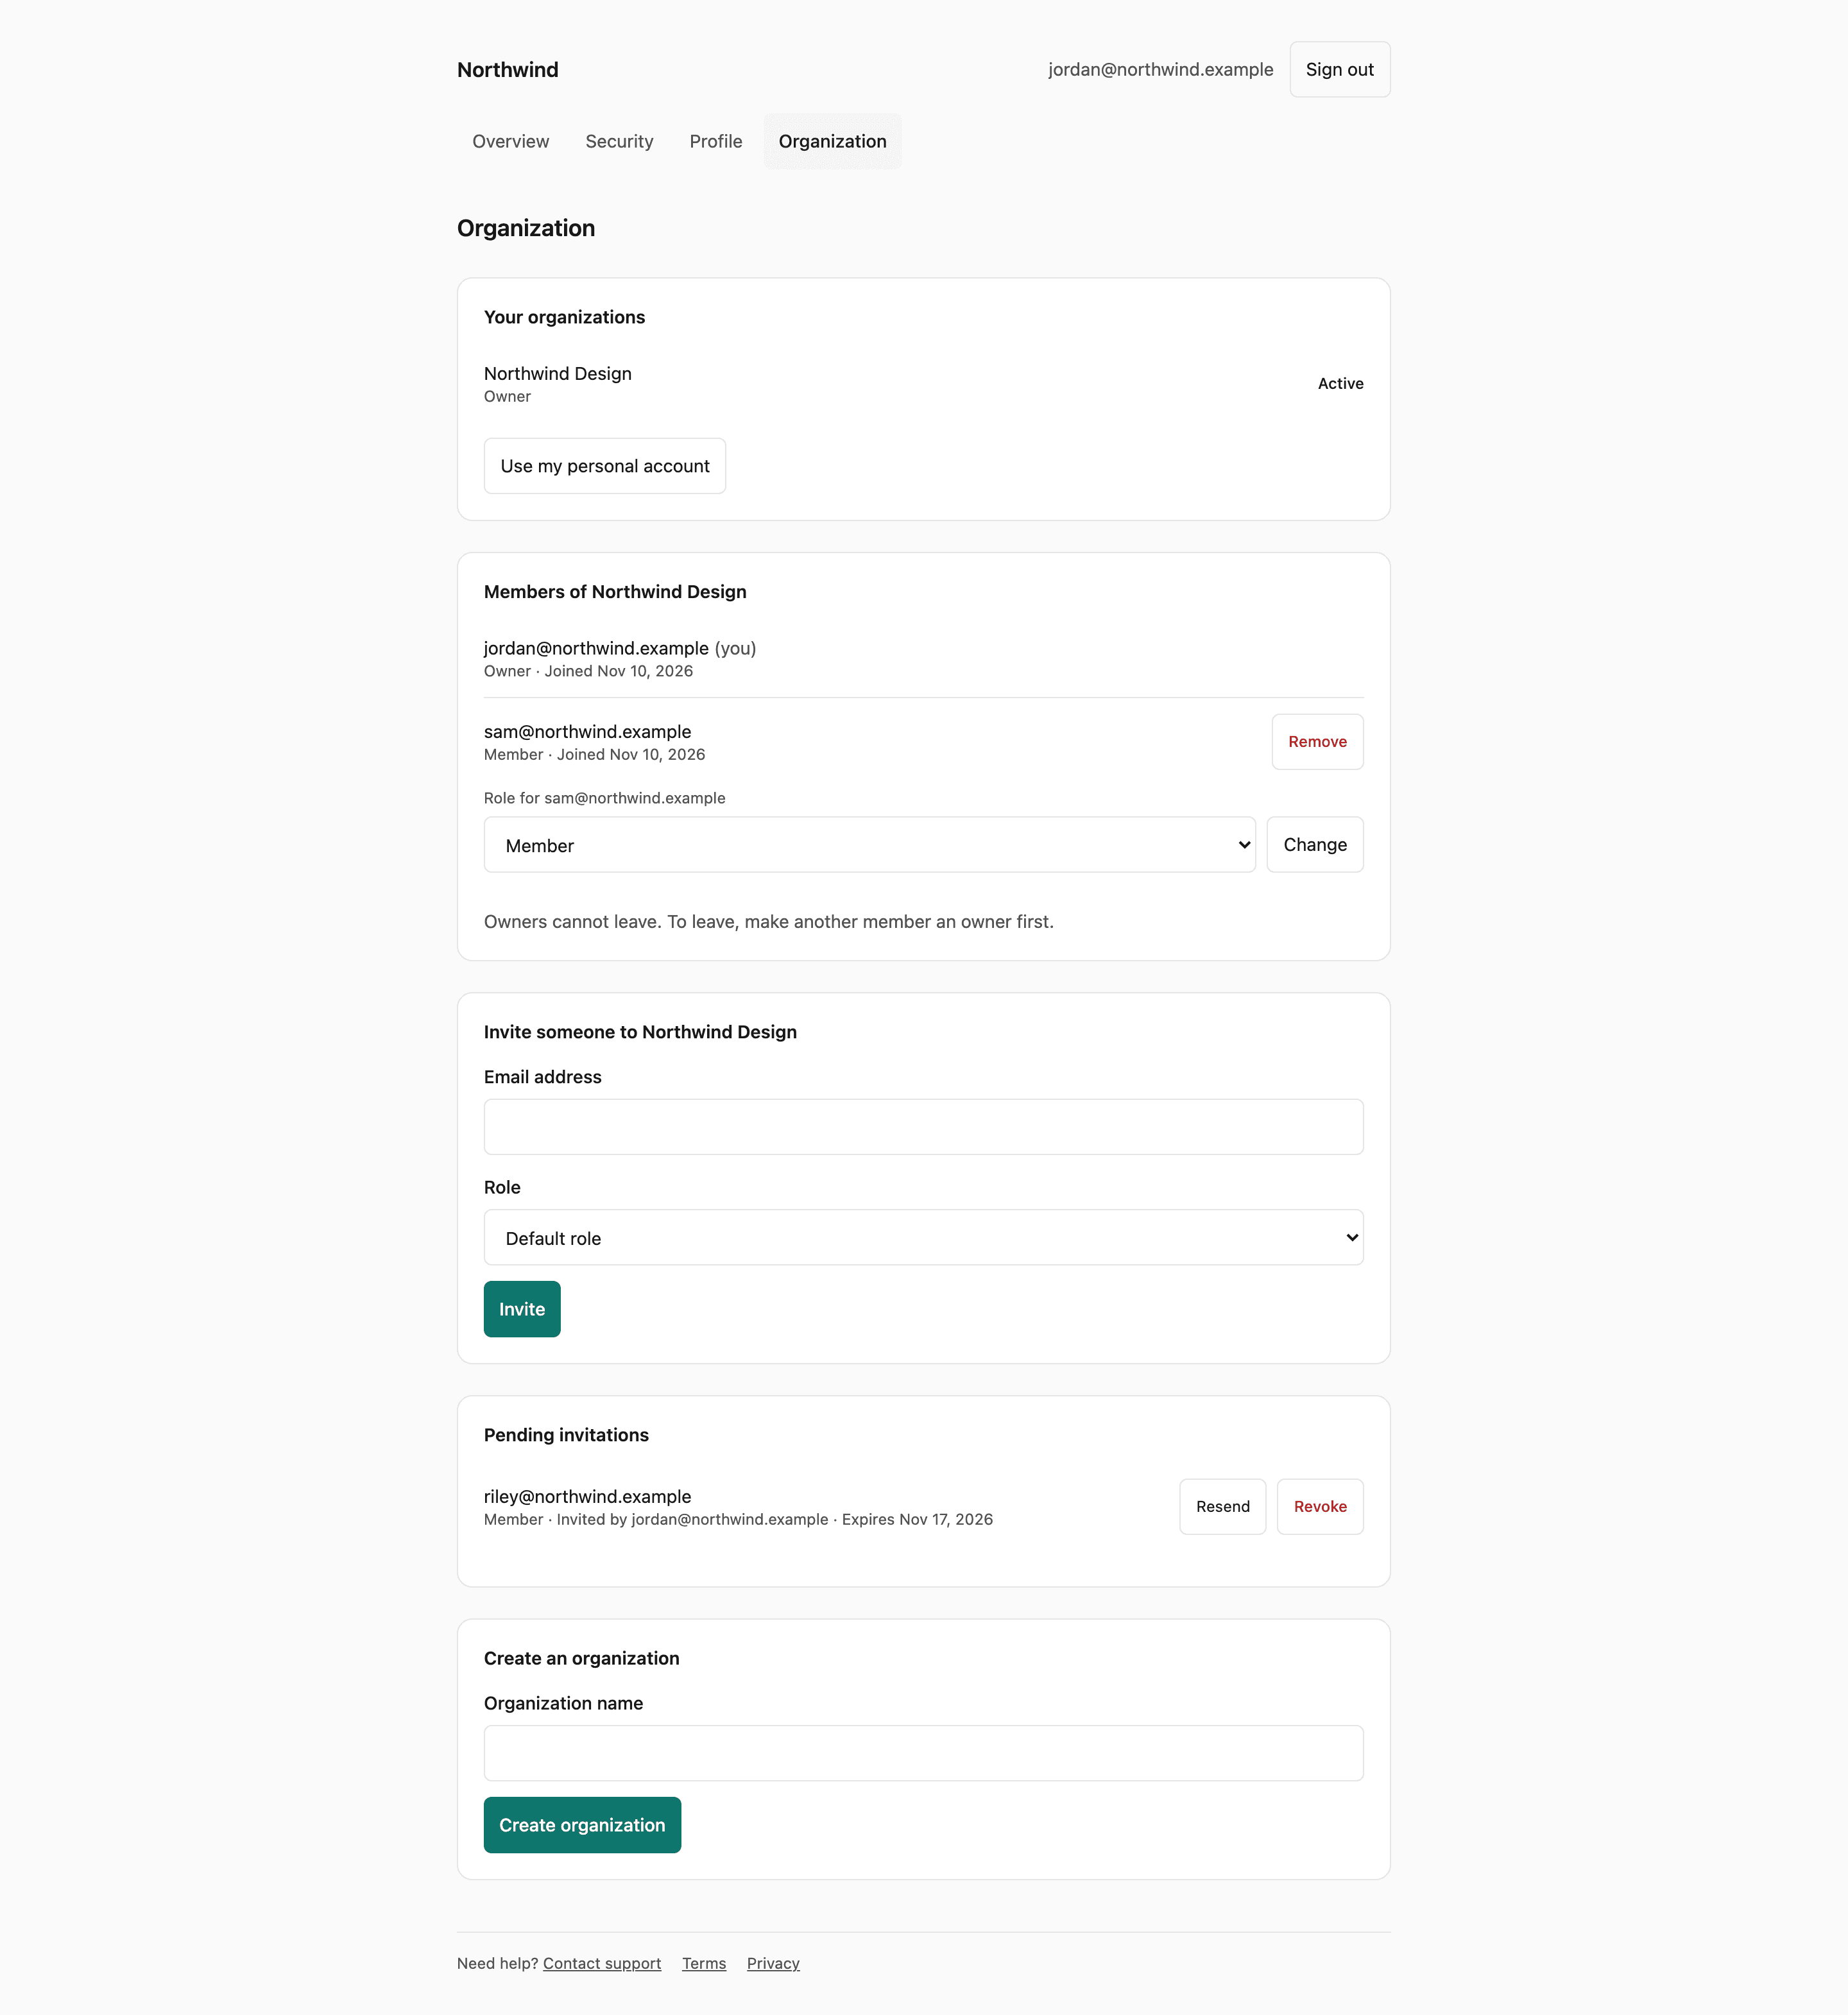
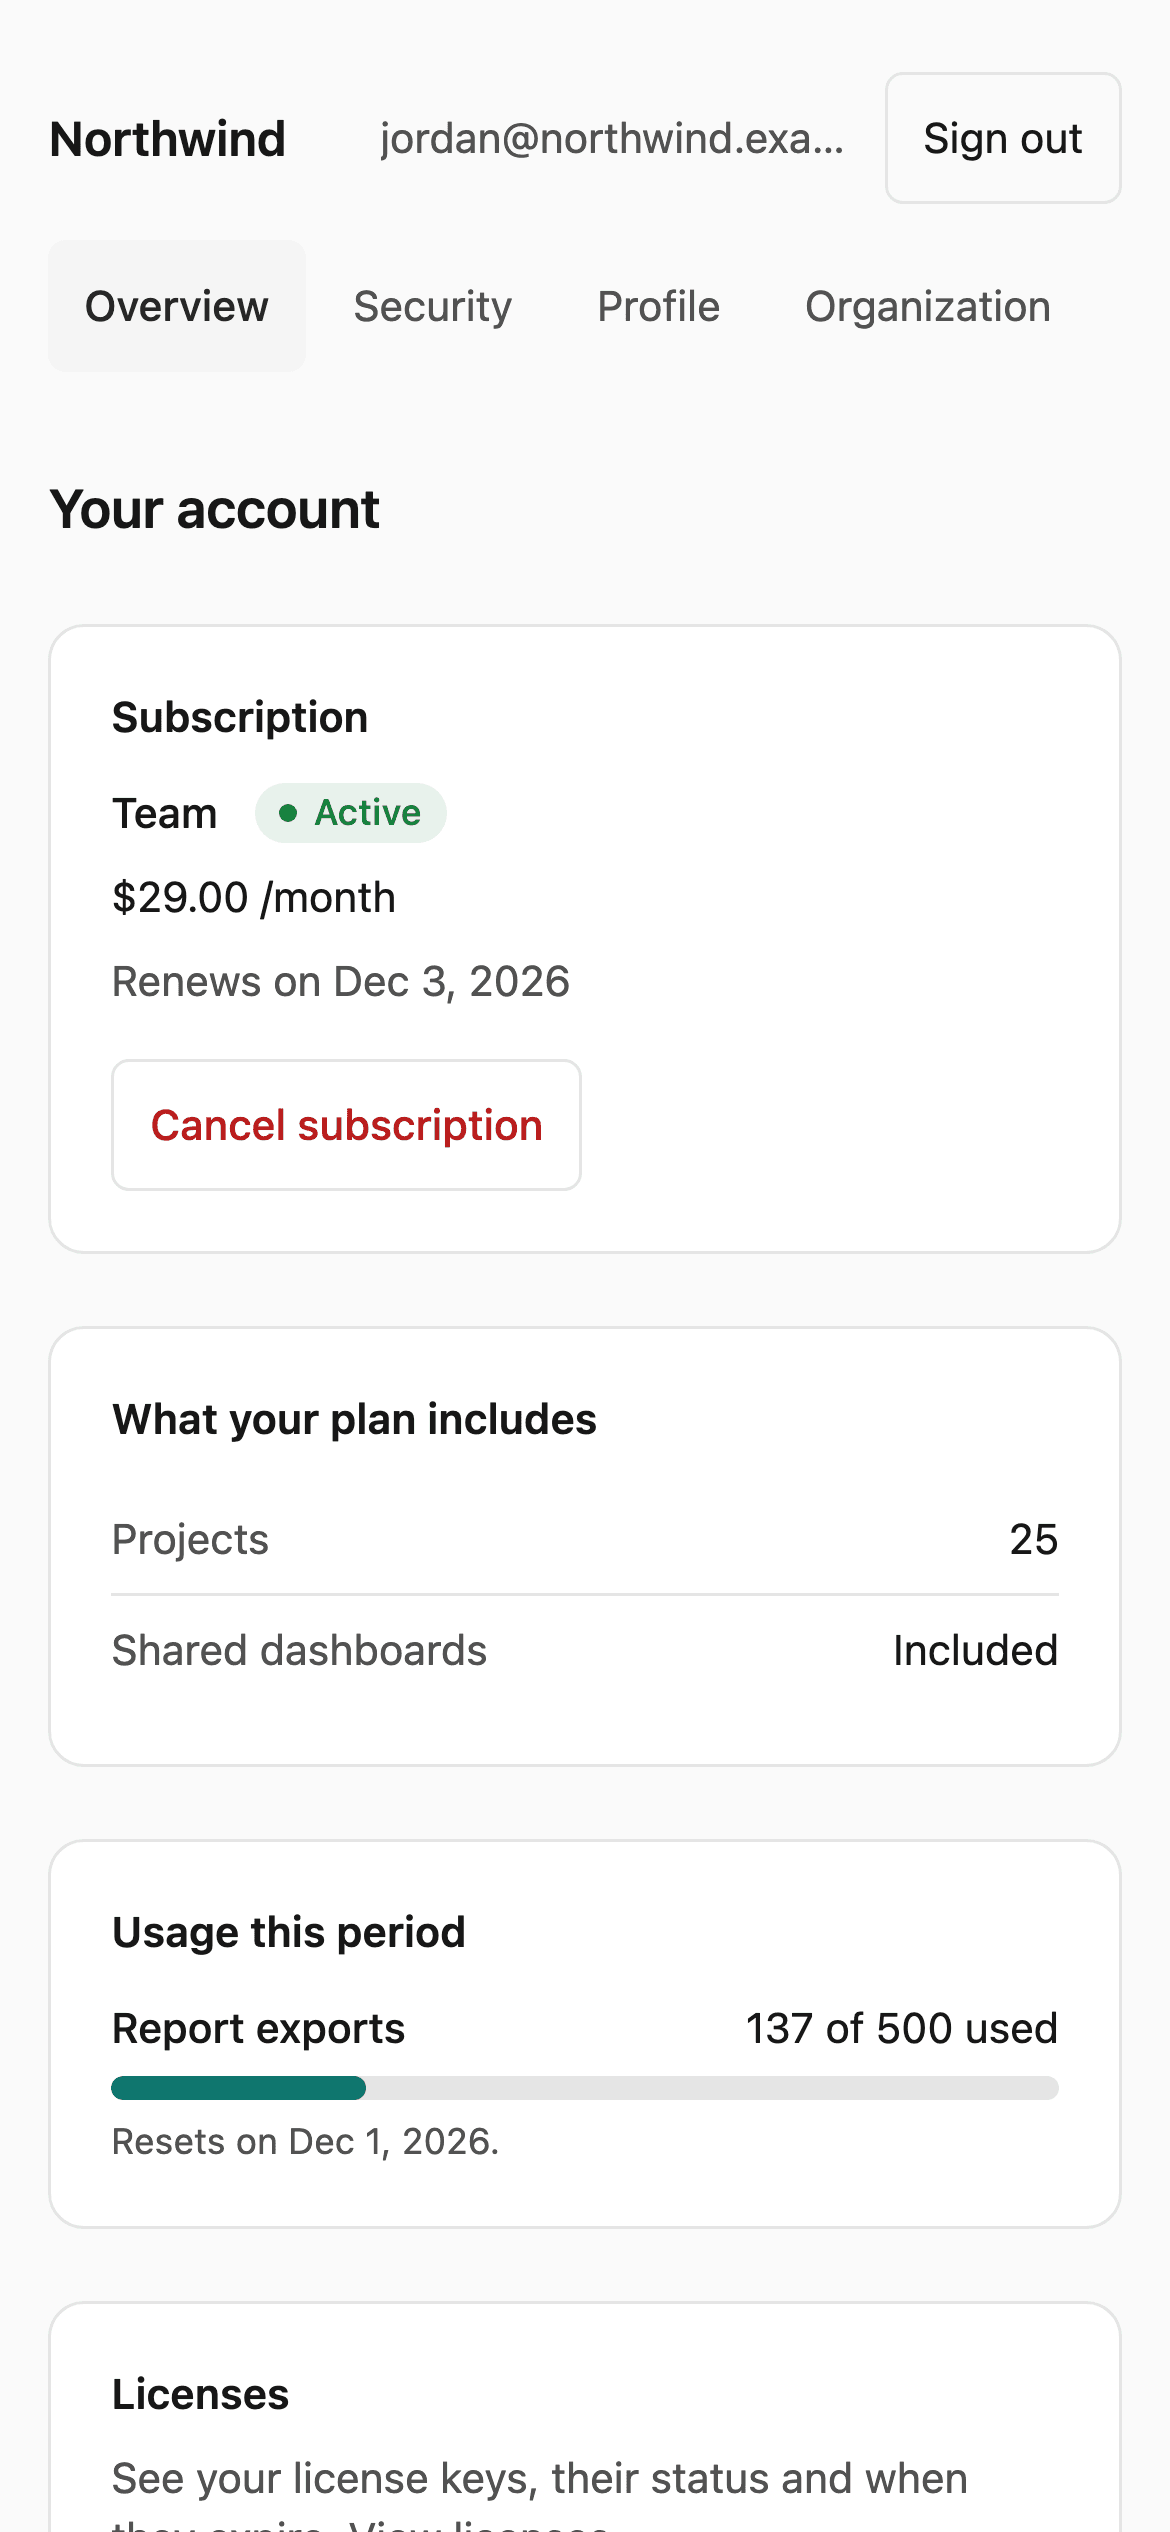
When your application bills organizations or lets customers create them, the Organization page lists the customer's organizations and lets them switch between them or go back to their personal account. An owner or admin can invite by email, change roles, remove members, and resend or revoke a pending invitation. The API now emails the invitation itself, in your application's branding.
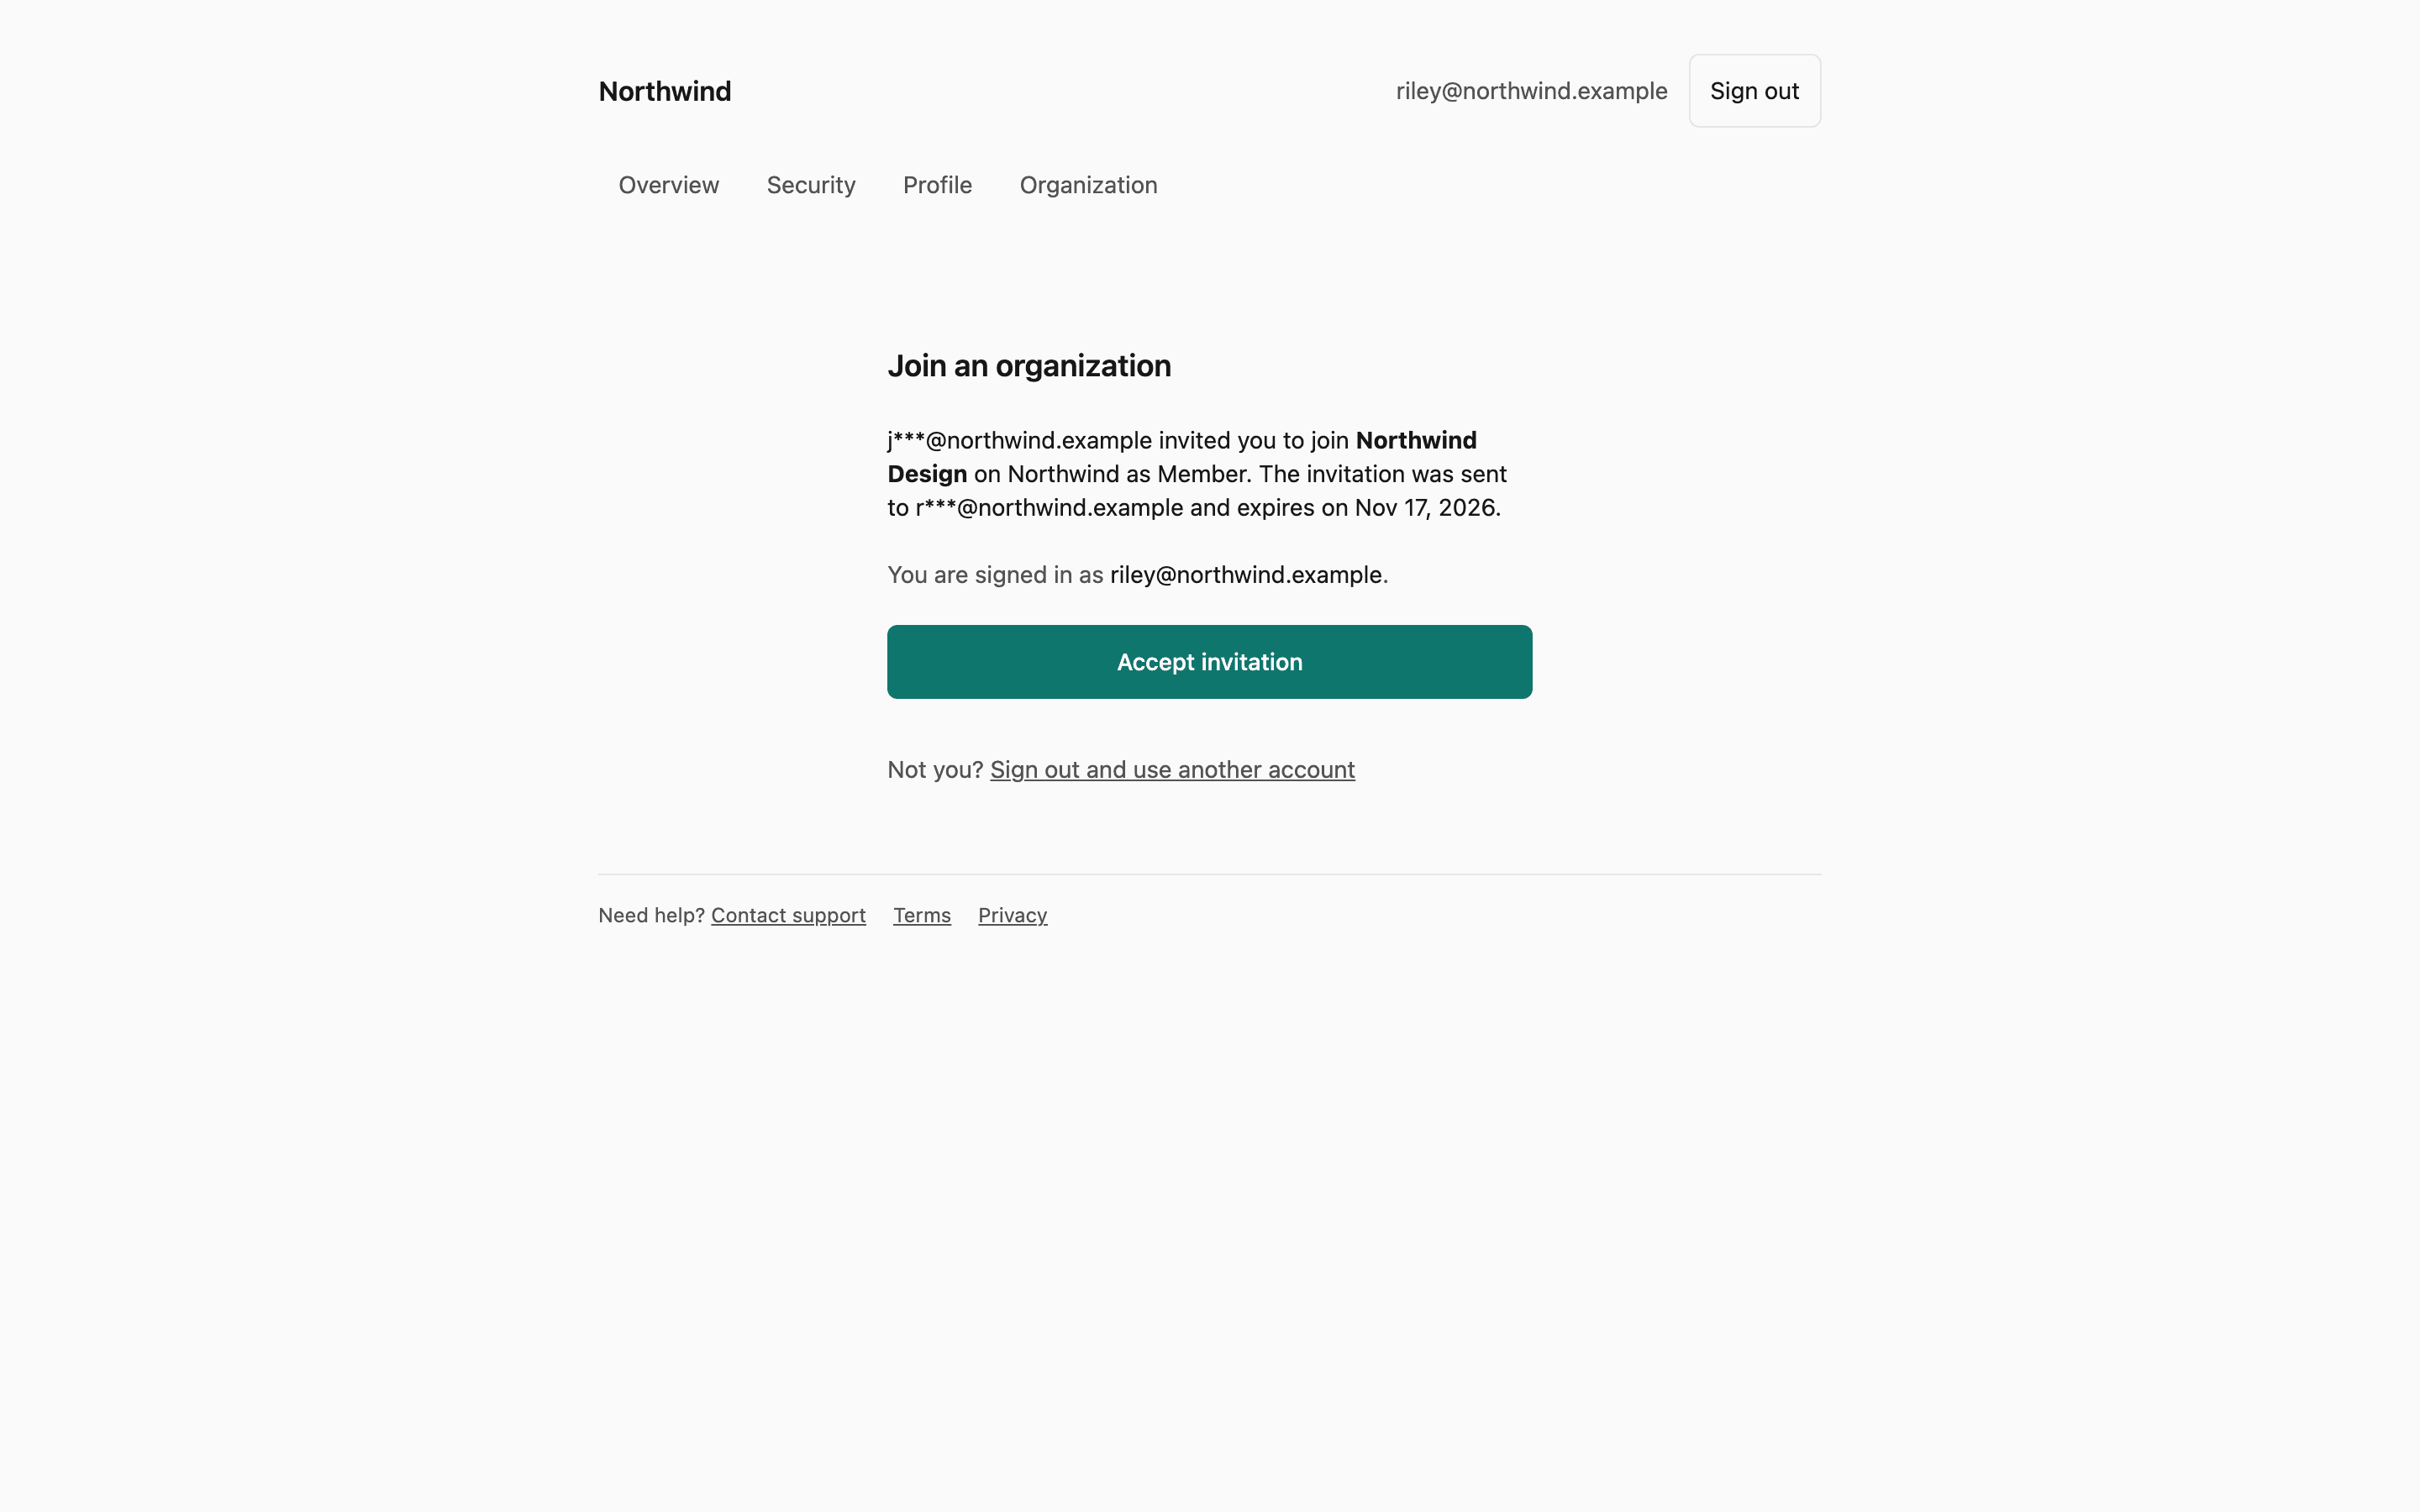
The invitation link opens a page that says who sent it, for which organization and role, the masked address it went to and when it expires. Signed out, the invitee signs in or signs up and comes back to it. Signed in as a different address, the page names the address to use.
Desktop apps
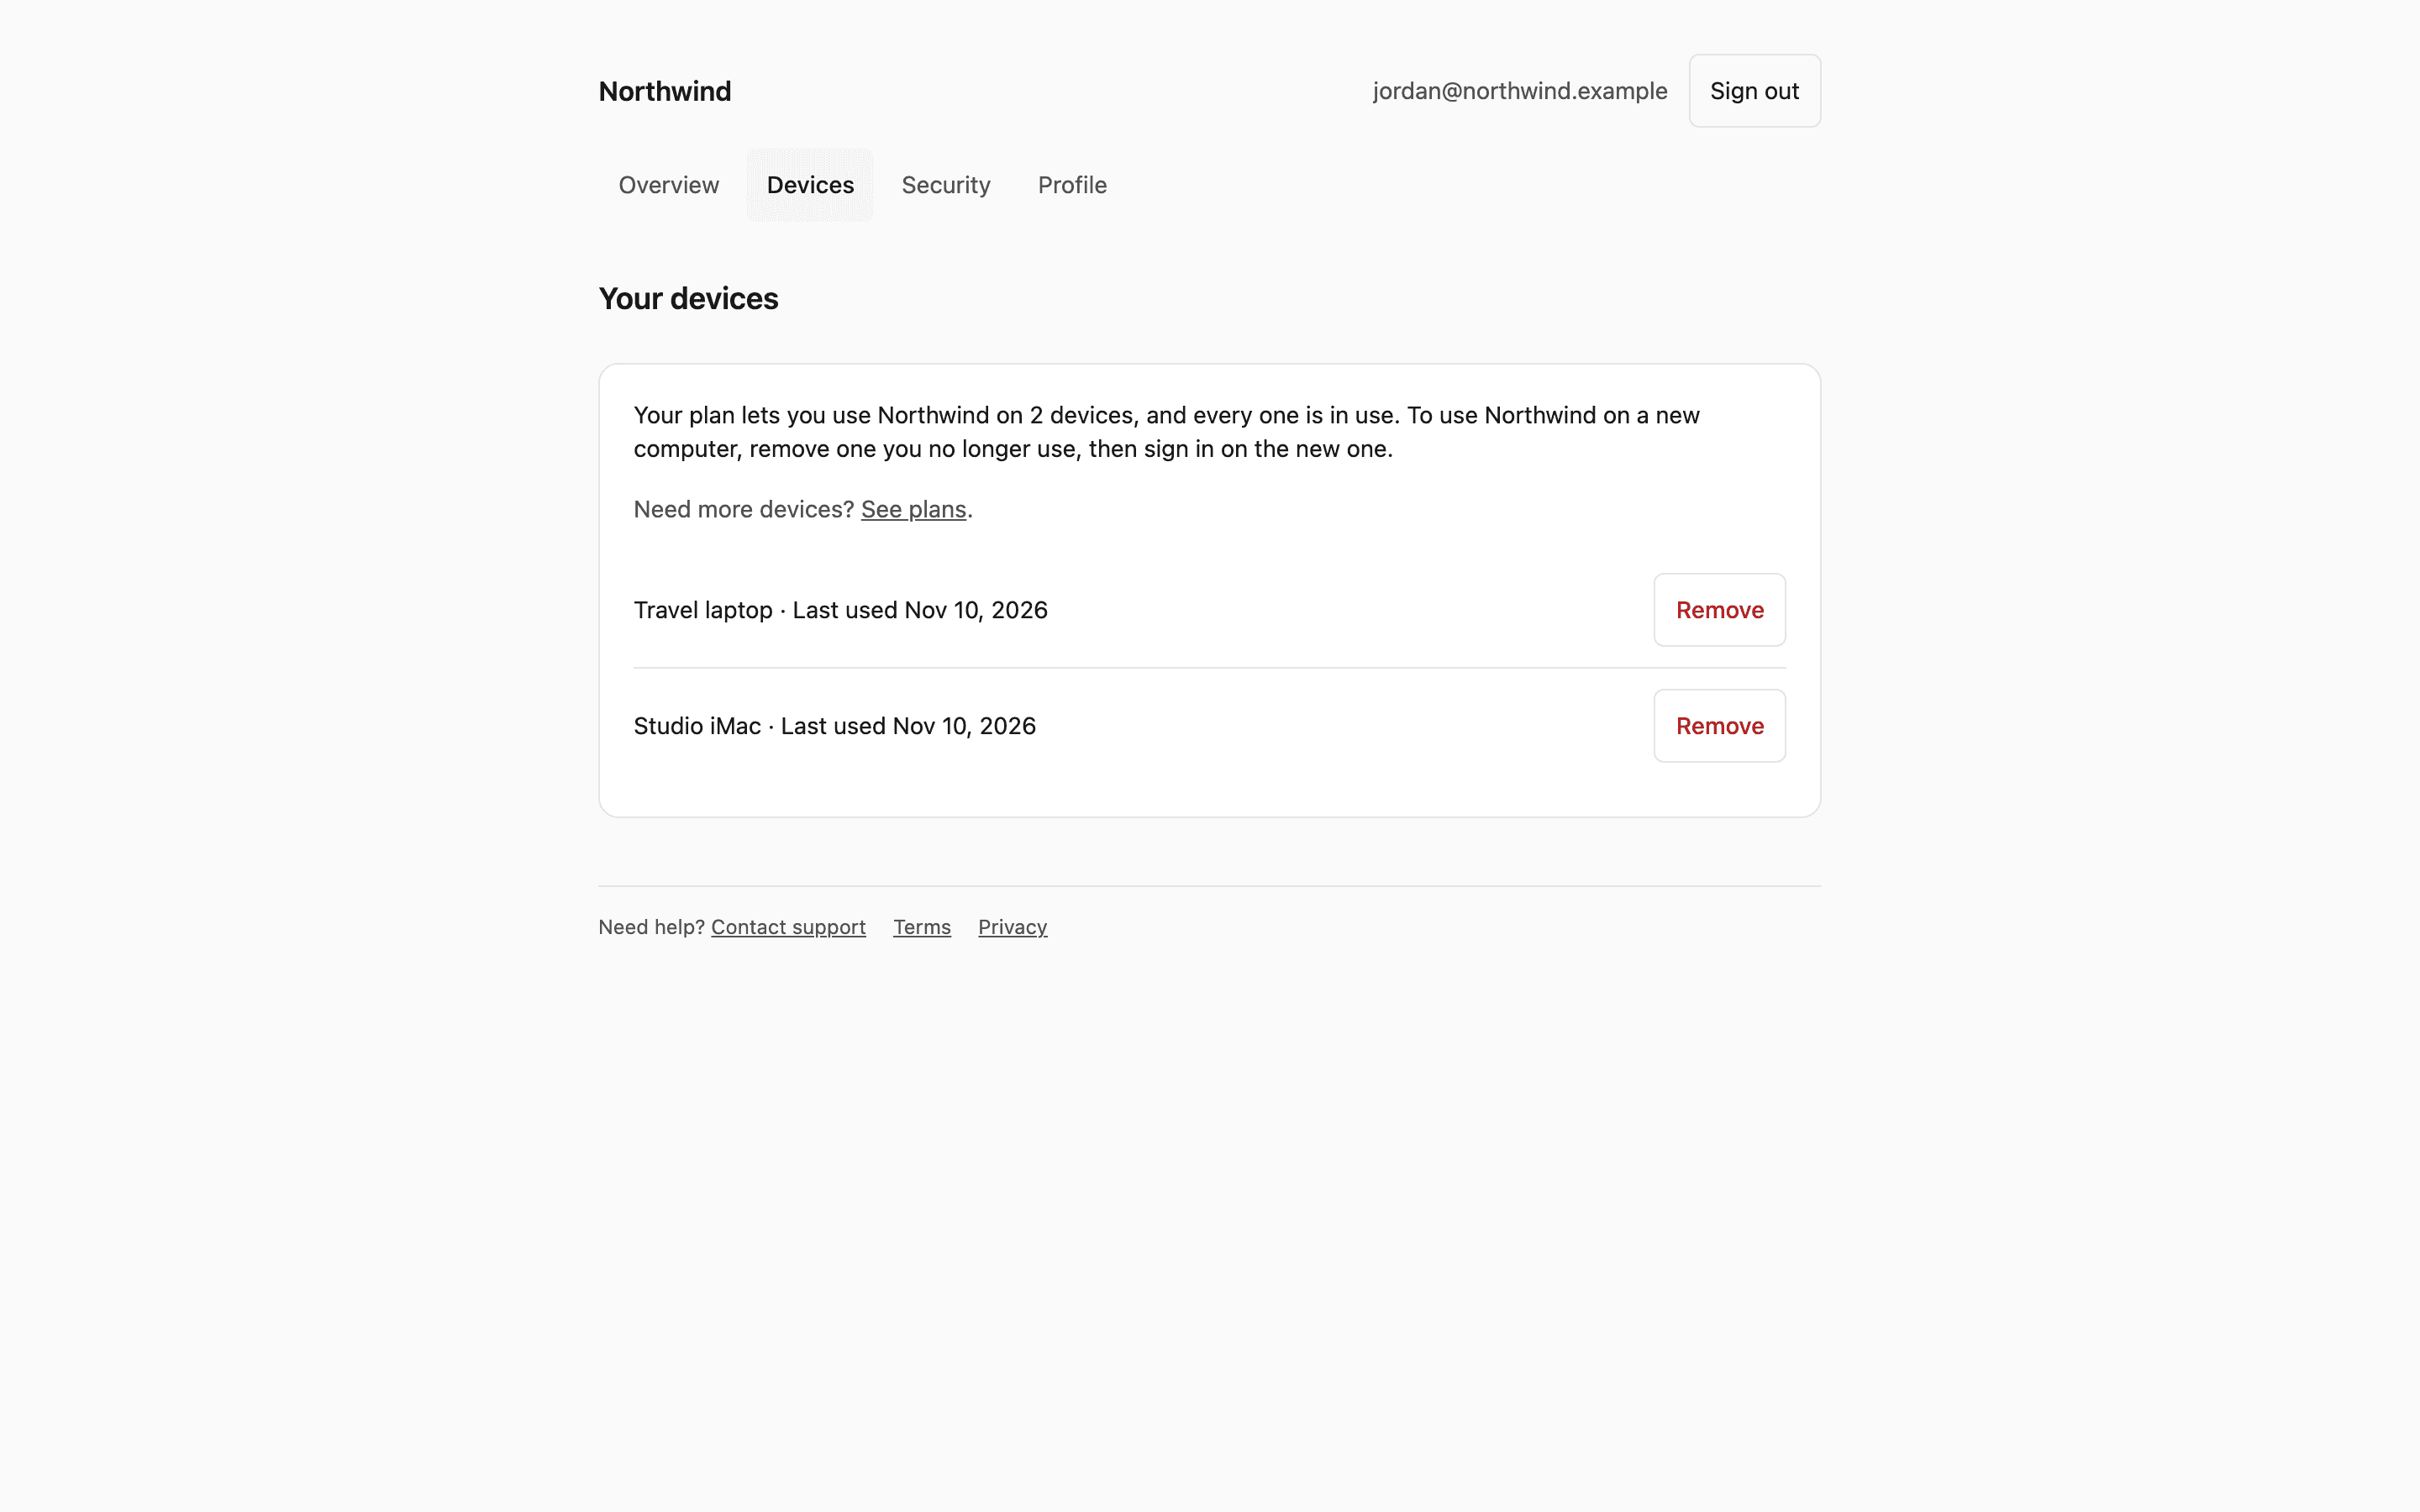
If your application binds sign-in to devices, a customer at the limit needed a release button in your app or a support ticket. The portal now has a Devices page that lists their active devices with when each was last used, and Remove signs that device out and frees its slot. Your desktop app can send a customer who hits the limit straight to /<slug>/login?return=devices, and they land back on the page after signing in. If you keep device release with your support team (deviceRelease: server_only), the page asks them to contact support instead.
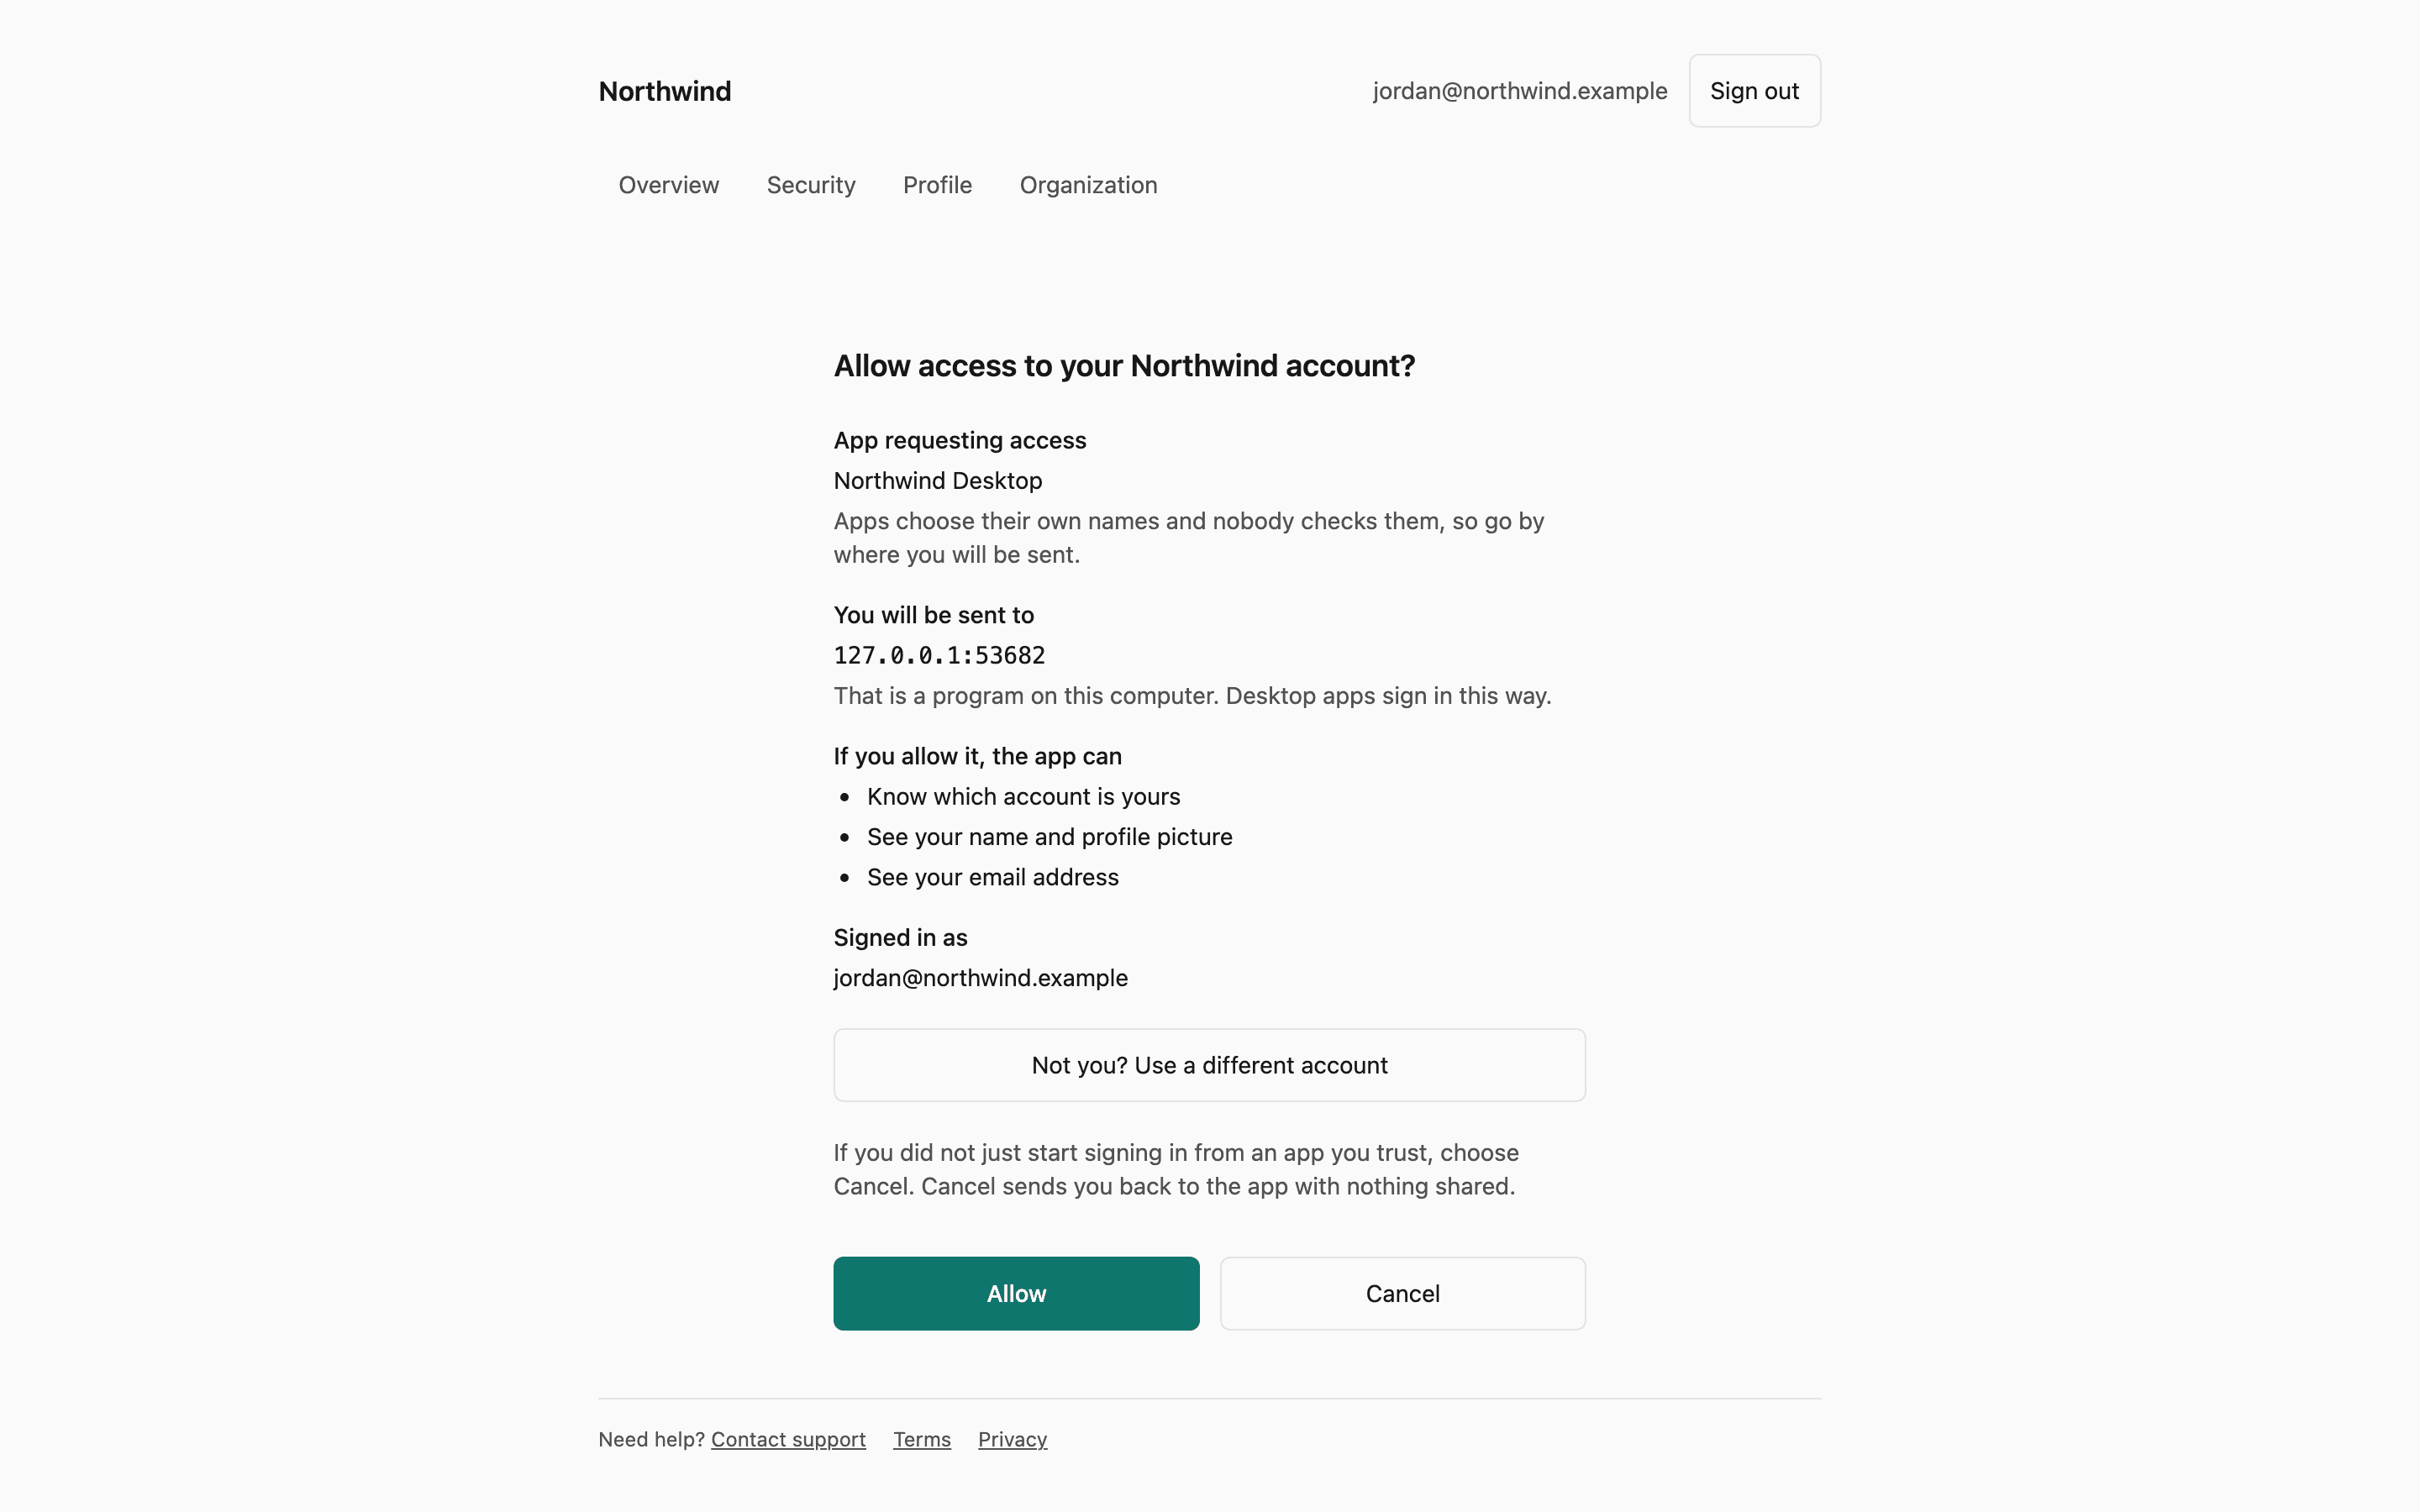
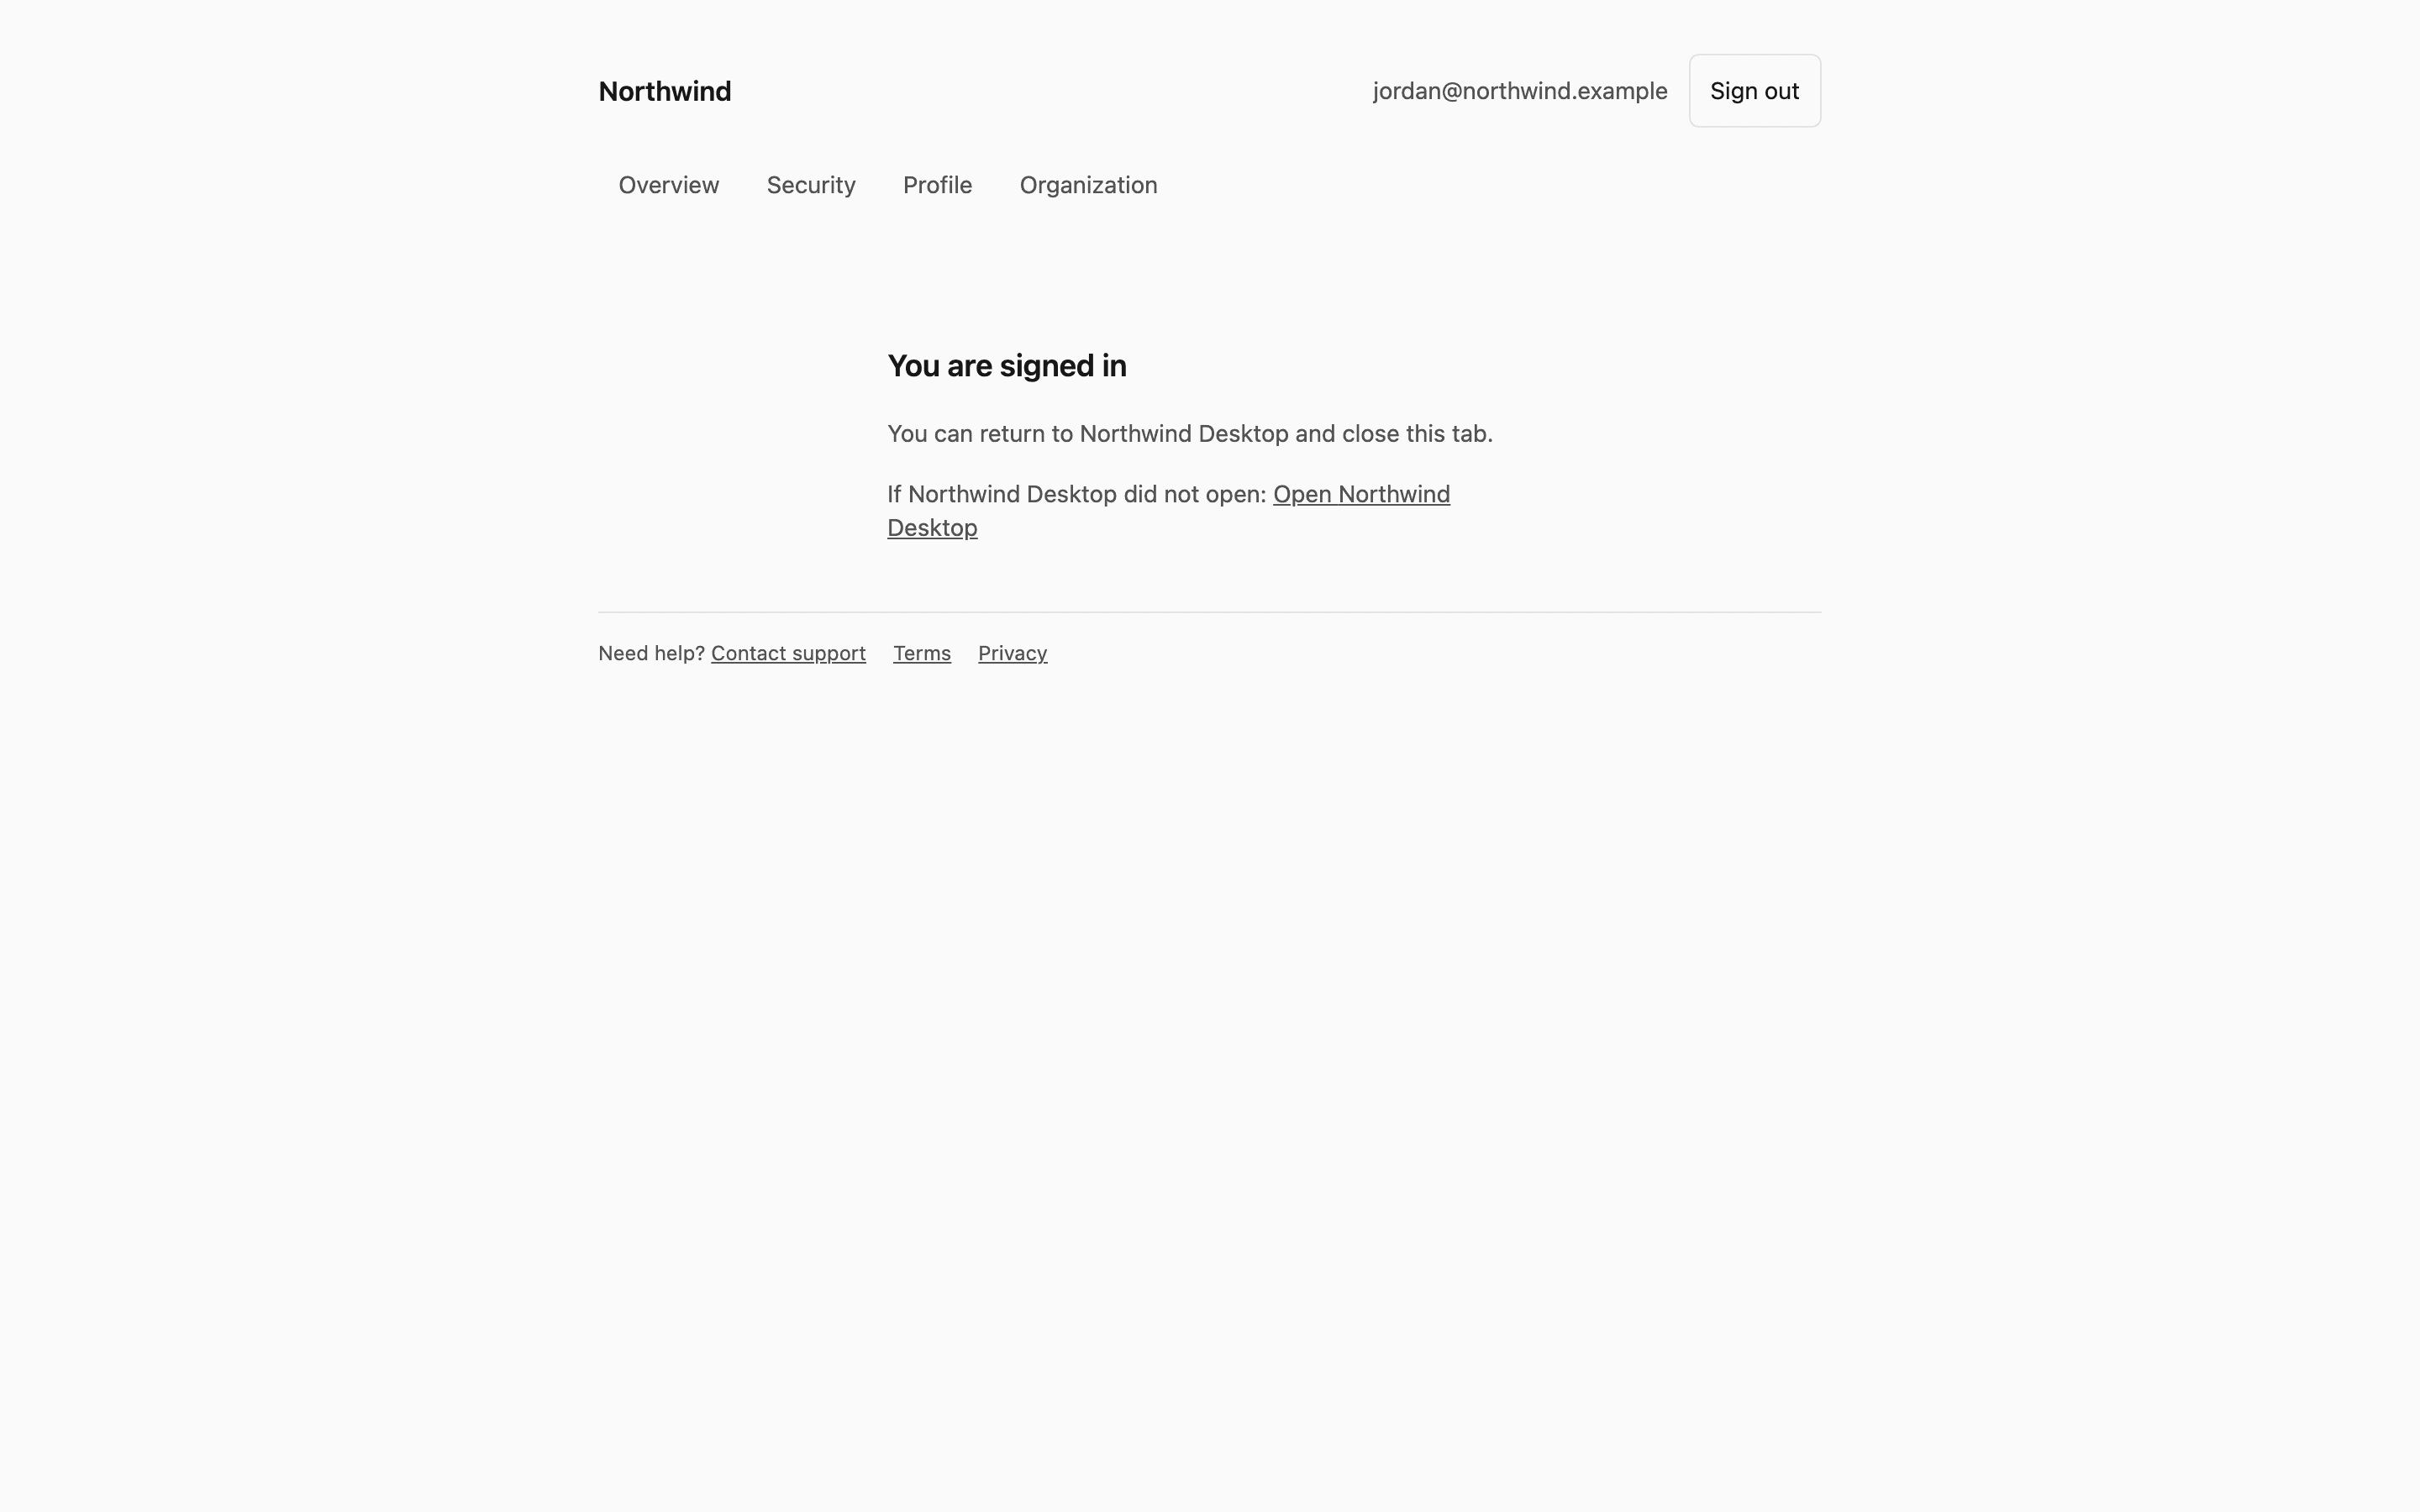
The portal is also the sign-in and consent page for an app that opens the system browser to sign in. If your application acts as an OpenID Connect provider or a hosted MCP server and you have not set your own hostedAuthorizeUrl, the authorization endpoint now sends the browser to the portal. The customer signs in with whatever the portal offers, sees which app is asking, where they will be sent and what it can read, and chooses Allow or Cancel. Consent is asked every time.
Browser sign-in does not work for an application that binds sign-in to a device (deviceBinding: 'required'). The portal's own session holds no device slot, so it cannot approve another app. The page says so and sends the app access_denied. Such an application needs its own authorization page, set as hostedAuthorizeUrl, that calls /grant from your server with your secret key and a normal device-bound session. The details are in docs/oidc-provider.md and docs/devices.md.
Your own domain
The portal can answer on a hostname of yours, such as billing.yourapp.com, with no slug in its URLs. The order matters, because verifying switches your emailed links, the authorization page and checkout returns to the new domain straight away:
- Enter the hostname under Application, Billing, Portal, Custom domain, and save.
- Add a CNAME from it to your portal host.
- Publish the TXT record the panel shows, named
_rekey-portal.<hostname>. - Route the host to the portal over HTTPS. Until it is verified, the portal answers it with an empty 404, which is how you can tell the routing and certificate work.
- Press Verify domain.
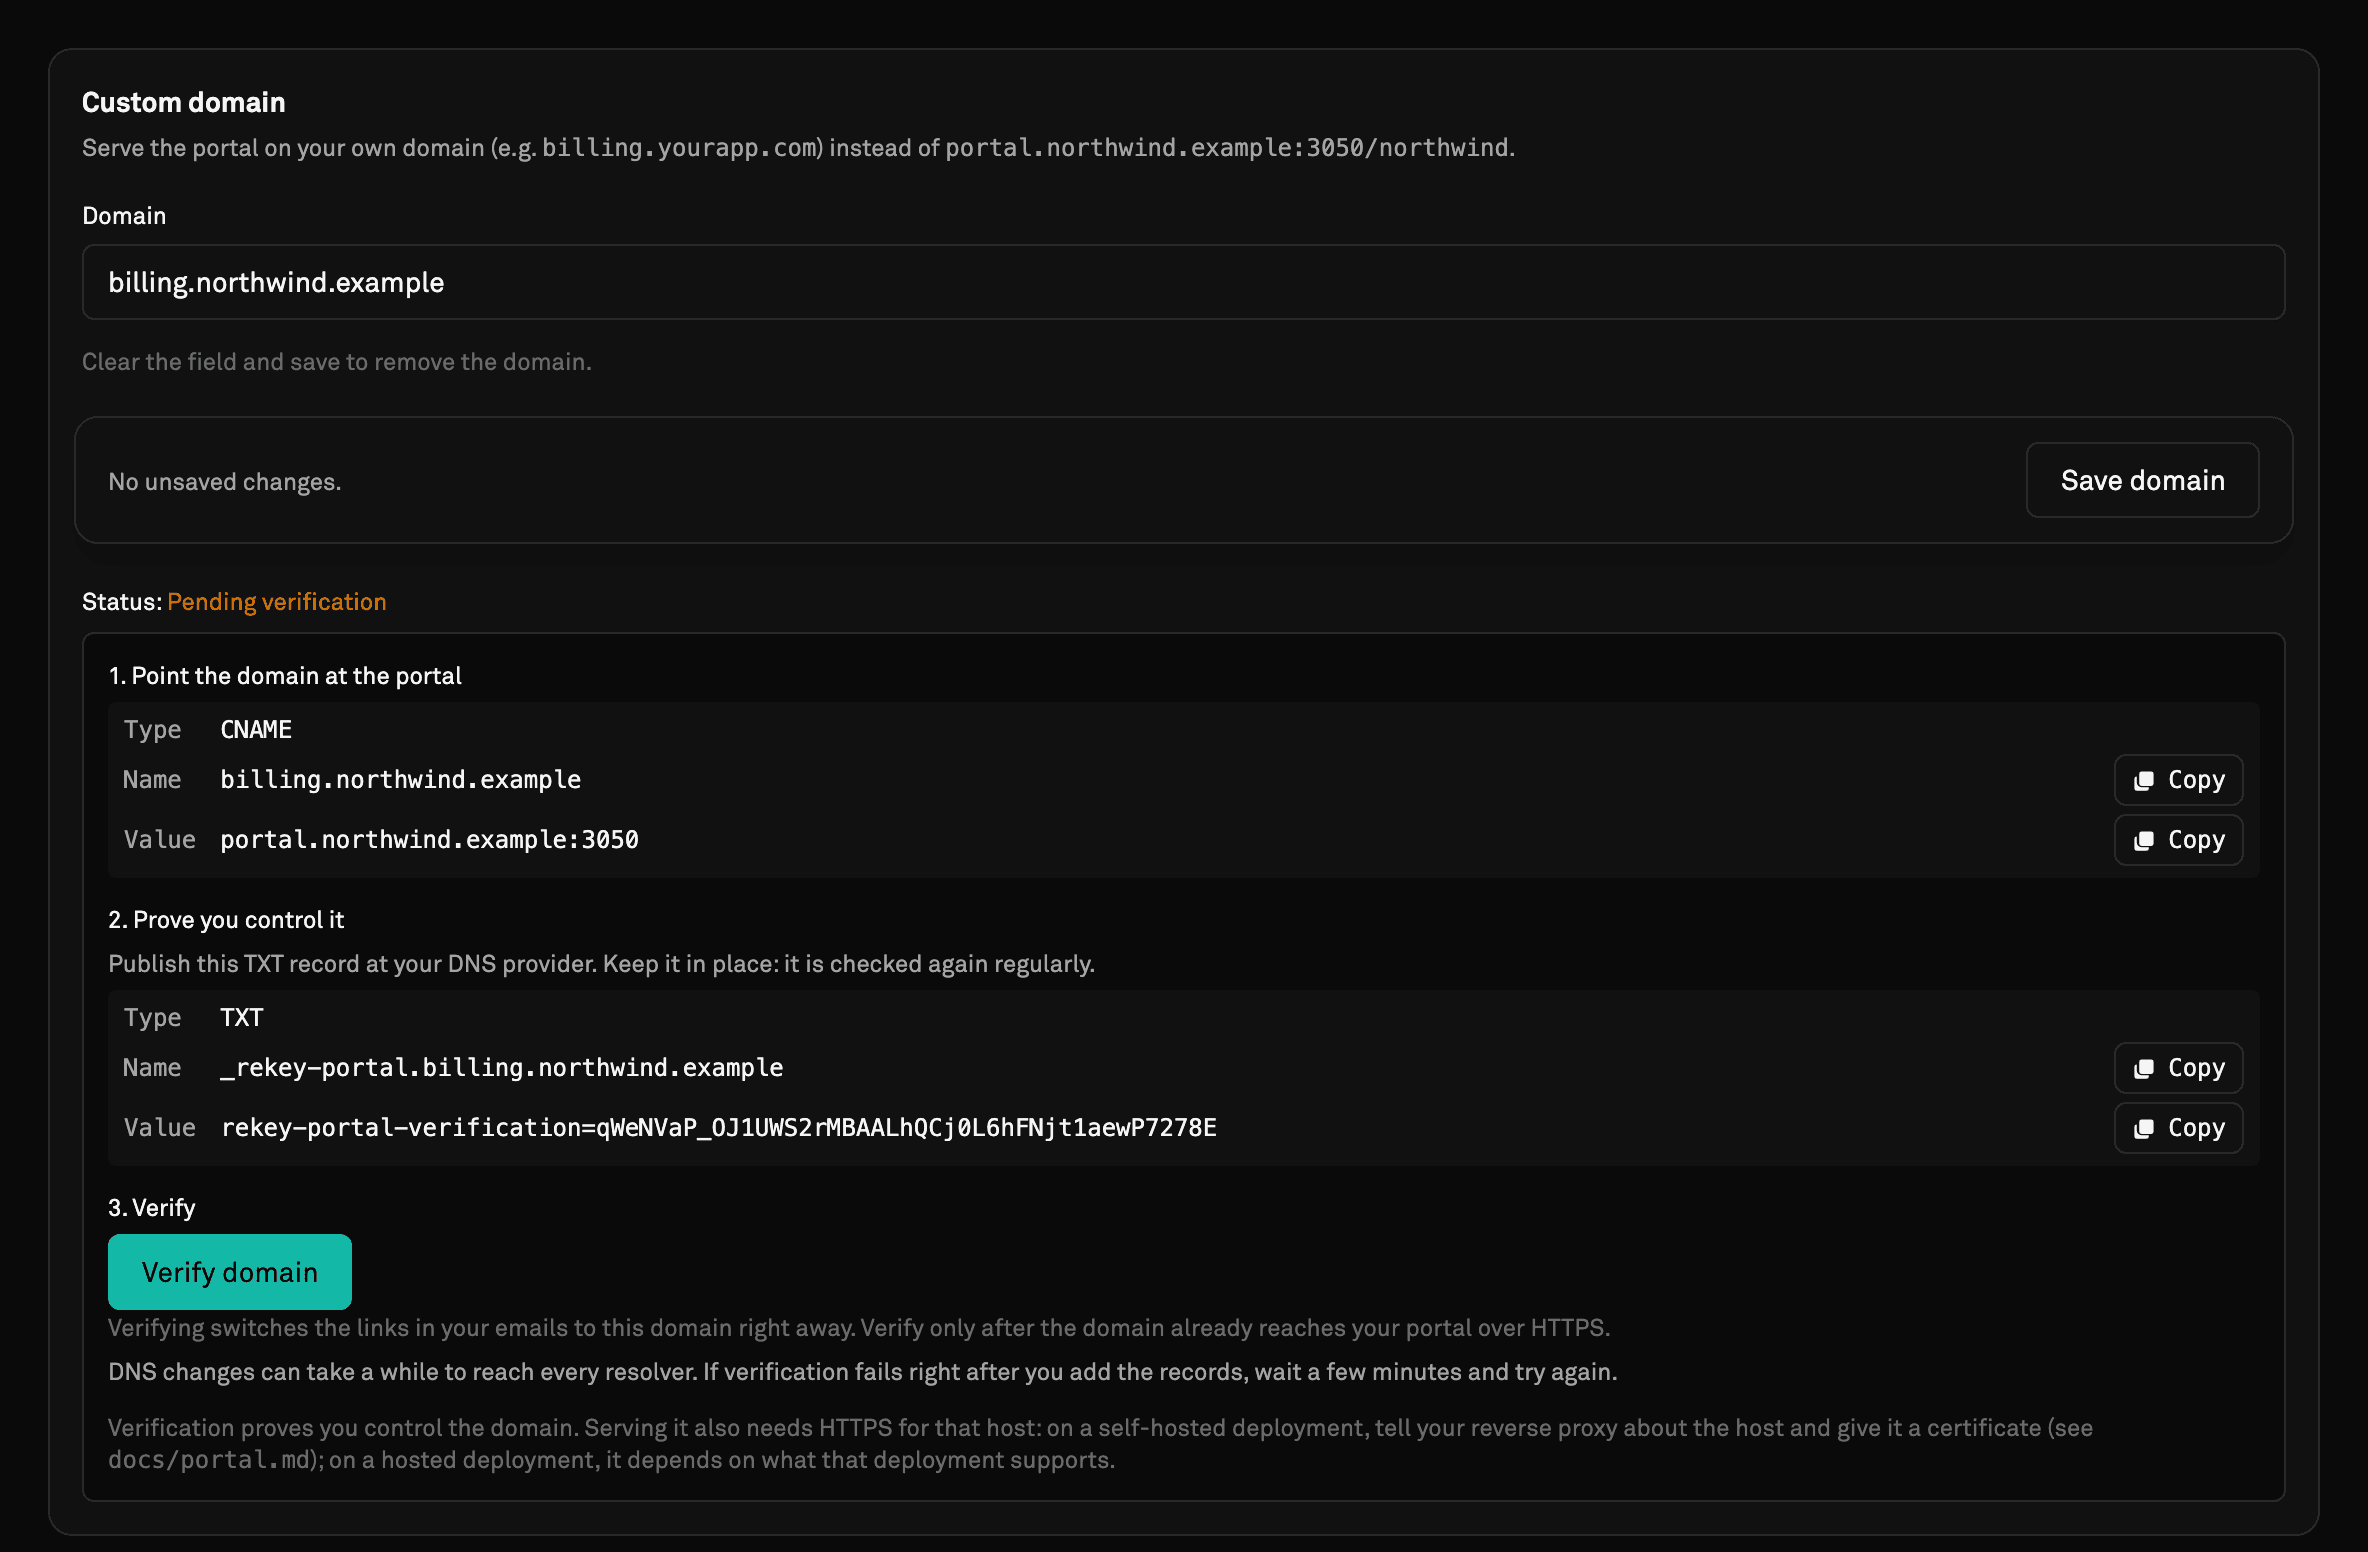
Rekey checks the TXT record again about every six hours. After three misses in a row the domain lapses and links go back to the shared address, so leave the record in place. Self-hosted with docker-compose.prod.yml, list your domains in PORTAL_EXTRA_HOST_RULES and Traefik routes them and gets a certificate for each. Behind another proxy, route the host to the portal and give it a certificate yourself. The full steps are in docs/portal.md.
It looks like your product
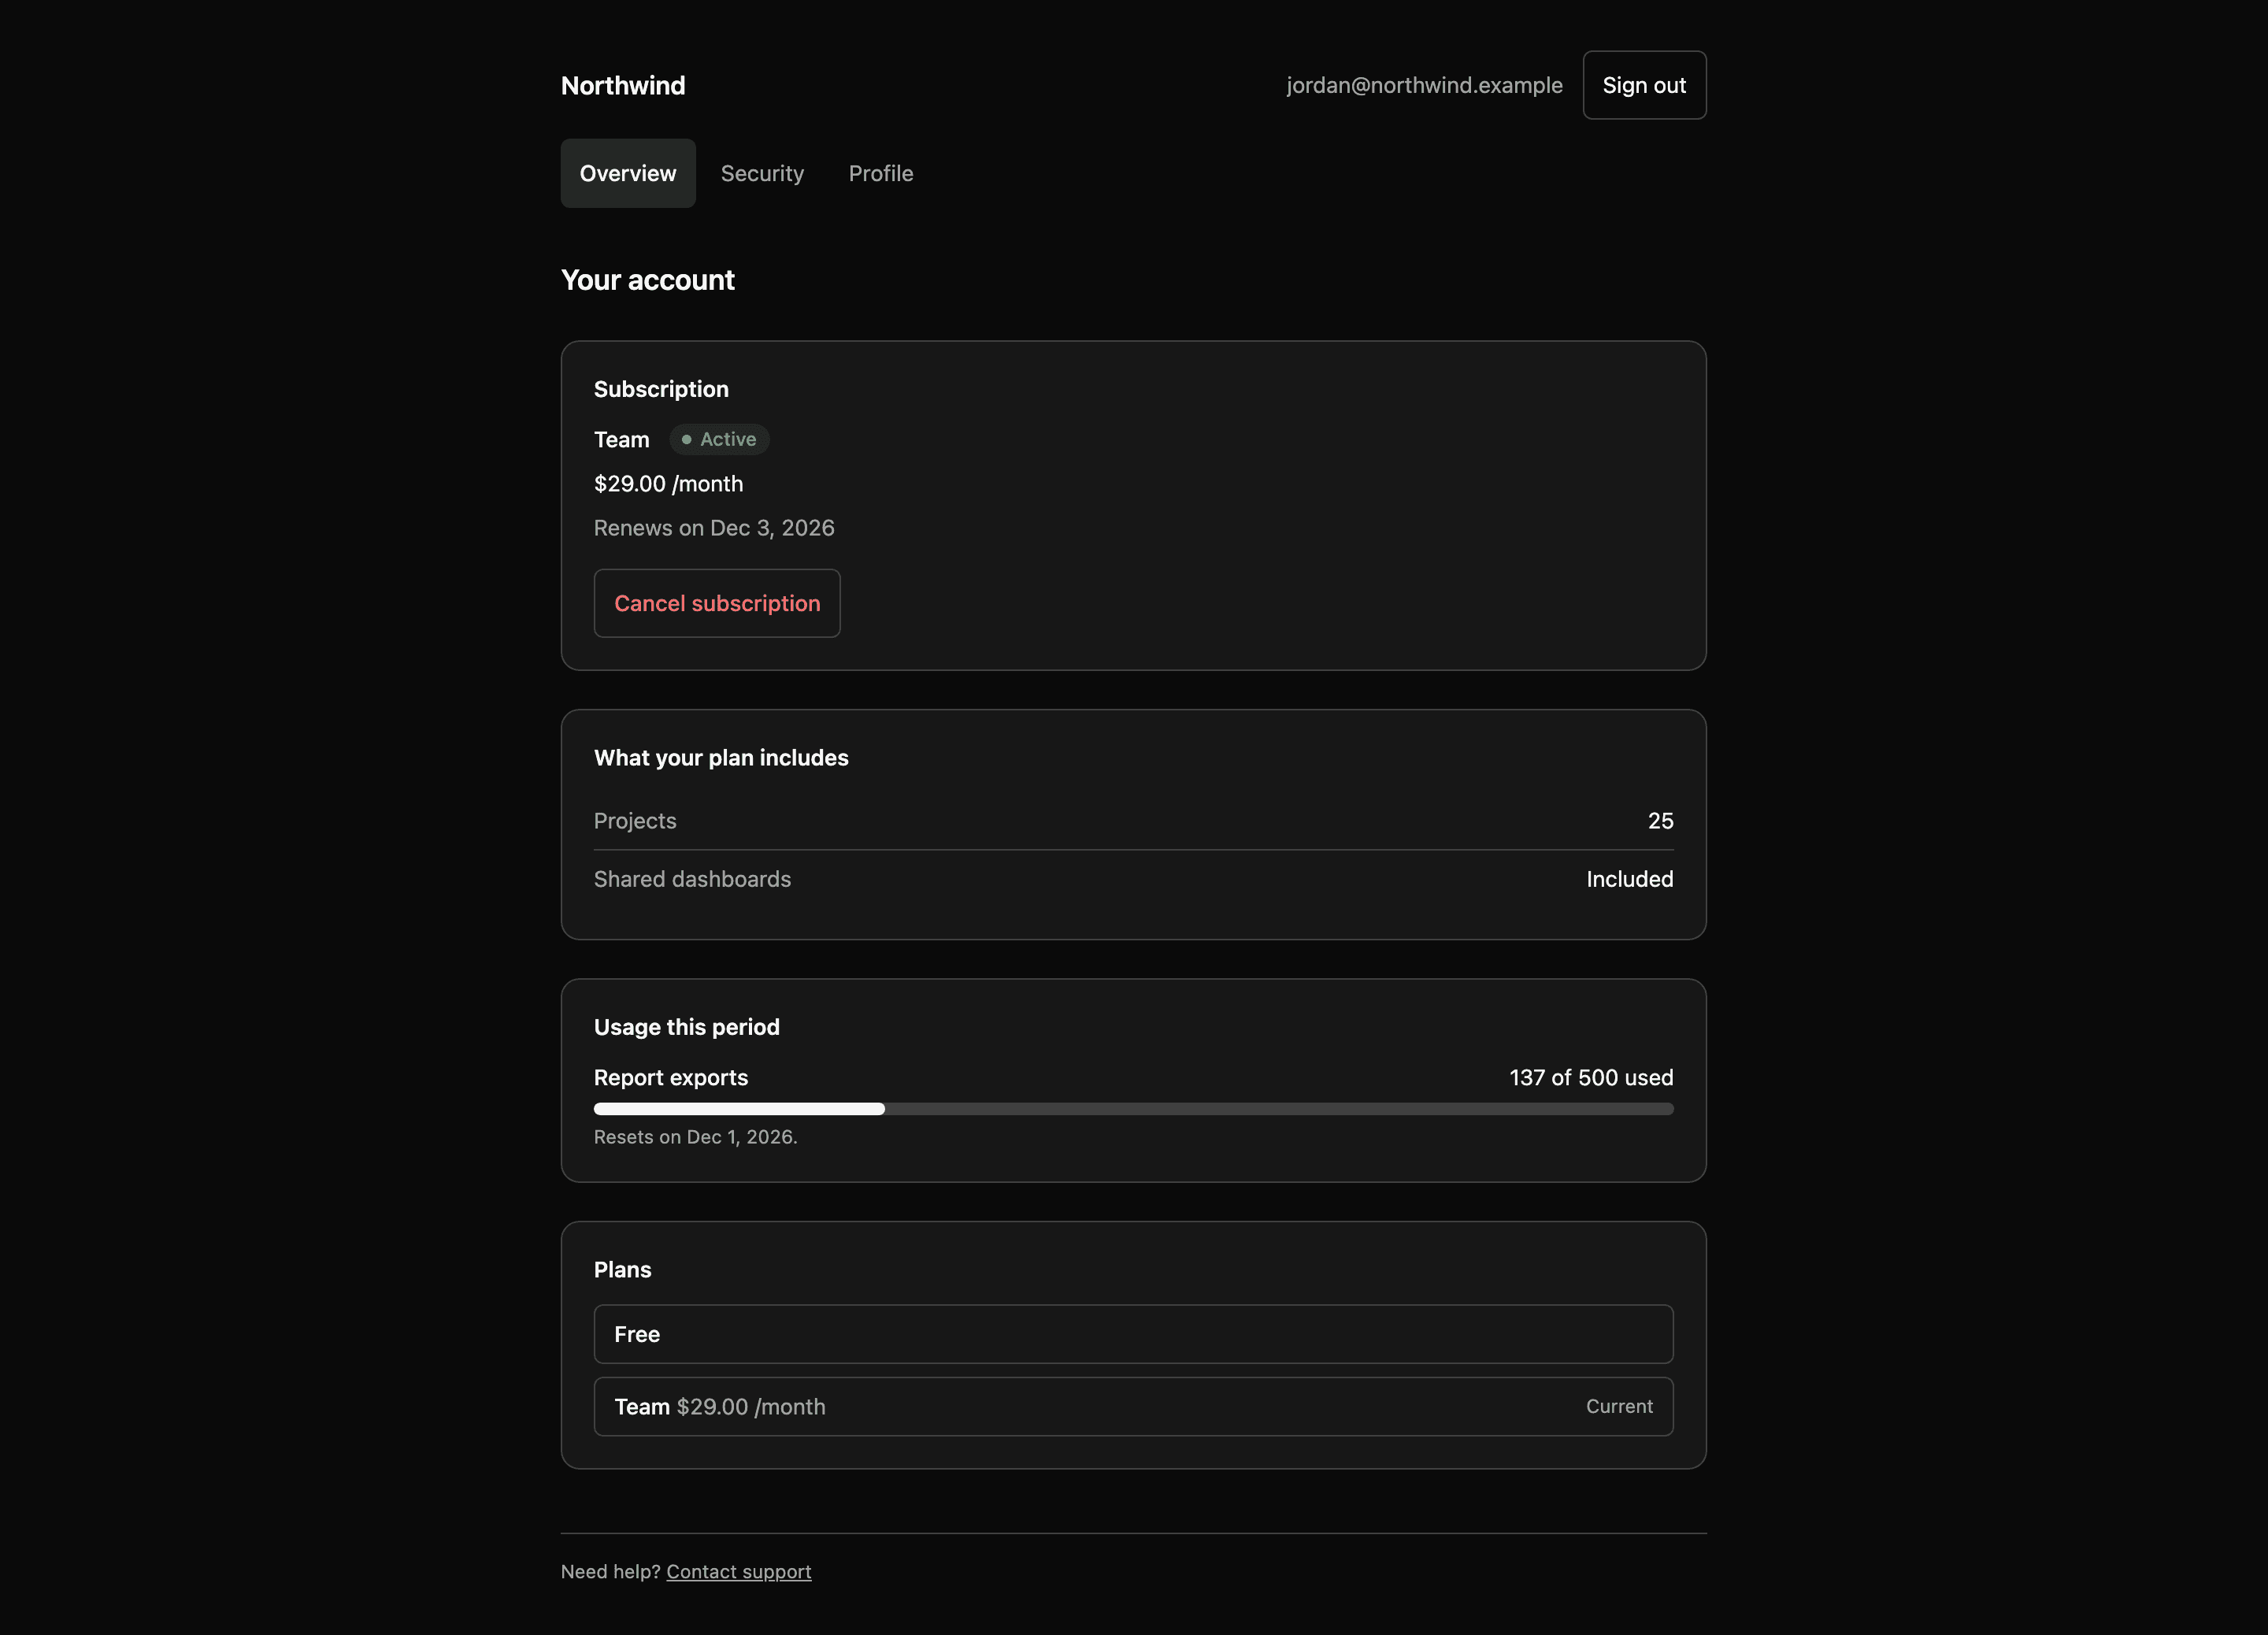
The portal carries your name, logo and the primary, background and surface colours from your portal branding, and links your terms, privacy policy and support contact in the footer. A colour that would leave the portal's text hard to read falls back to the default. With no brand colours set, the portal follows the visitor's dark mode. Touch targets are at least 44 pixels, and dates and amounts are written in the visitor's locale.
Required two-factor is now enforced
When an application sets mfa: 'required', 2.4 checks it on every session, not only at sign-in. A user with no confirmed authenticator, including one who signs in only with a passkey, gets 403 MFA_ENROLLMENT_REQUIRED on ordinary user routes. Sessions issued before the upgrade are held back the same way.
Such a user can still enrol and sign out: GET /auth/mfa/status, POST /auth/mfa/setup, POST /auth/mfa/setup-confirm, POST /auth/send-verification, POST /auth/sign-out-everywhere, and GET /auth/me and GET /users/me without include. If your own app signs users in, check for mfaEnrollmentRequired on the sign-in result and send those users through setup before anything else. Treat a MFA_ENROLLMENT_REQUIRED from any other call the same way. Customers who use the portal are taken to its setup page automatically.
Upgrading
One migration, 20261110132835_portal_domain_verification. Run prisma migrate deploy, then deploy the API, panel and portal together, because the portal config response changed shape. Upgrade the @rekey.dev/* packages at the same time. The rest of what needs action:
- For a device-bound application, set the same
INTERNAL_CALLER_SECRETon the API and the portal, or its customers still getDEVICE_FINGERPRINT_REQUIREDin the portal. The portal'sPORTAL_BASE_URLmust have the same origin as the API'sPUBLIC_PORTAL_URL. - An application with
oidcEnabledormcpEnabled, the portal on and nohostedAuthorizeUrlnow sends authorization to the portal instead of the built-in page. - Organization invitations are emailed on invite and on resend. If your app mailed the link itself, stop, or the invitee gets two.
billing.getPlansin@rekey.dev/nodeandgetPlansin@rekey.dev/reactreturnPublicPlanPage, which addsdefaultPlanSlug.- Deleting an account with no password and no two-factor from a browser now answers
401 EMAIL_CODE_REQUIRED. Request a code withPOST /auth/email-codeand send it asemailCode. - Portal brand colours must be 3 or 6 digit hex. Anything else falls back to the default.
- Rotating
JWT_SECRETlapses every verified custom domain until its TXT record is published again.
The steps in order, with the commands and checks, are in upgrading a self-hosted Rekey to 2.4.0. The full list, including the new endpoints, SDK methods and error codes, is in the 2.4.0 changelog.
What is not in 2.4
The portal does not yet let a customer update their payment method, download invoices or change plan in place. Subscribing to another plan starts a second subscription and cancels nothing, and the plan page says so before they pay. Passkeys are not managed in the portal either. These are on the changelog as planned, without dates.
Where to go next
- Read what customers can do page by page in docs/portal.md.
- Let a desktop or MCP client sign users in with your application as an OpenID Connect provider.
- Decide whether you need teams with when to use organizations.
Was this page helpful?